Easy Smoke and Mist With Photoshop
For this tutorial I thought I’d share with you a real quick technique for creating realistic looking smoke/mist in just 4 simple steps…
This is one of those techniques that when used on the right image can really add that something extra and an example of where I recently made use of it was in a composite that started off in the studio.
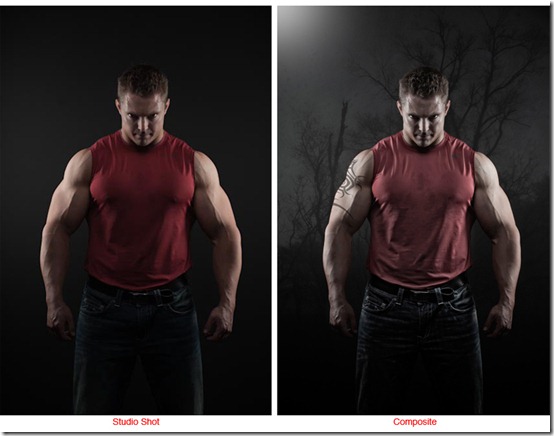
Here you can see the shot taken in the studio and then edited in Photoshop up to the point where we’re just about finished except for adding in the smoke/most and playing with the colour a little:
So, on to the technique…
Step 1: Add some Clouds
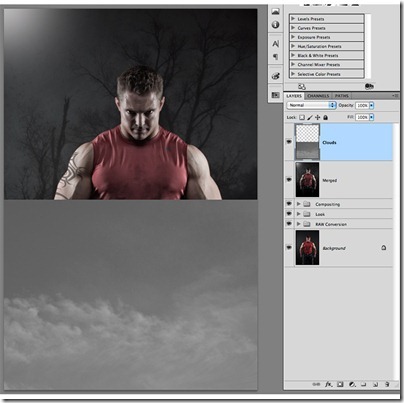
With your image open in Photoshop, the first thing we need to do is to add a photograph containing clouds.
Now one thing I’m always doing is taking photographs of textures and sky whenever I’m out and about and so consequently I have a folder on my Hard Drive containing clouds. So, all I needed to do was choose a suitable picture and bring it into Photoshop as the uppermost layer:
Step 2: Desaturate
Next thing to do is to remove all the colour from your ‘Clouds’ layer and so to do this go to IMAGE…ADJUSTMENTS…DESATURATE:
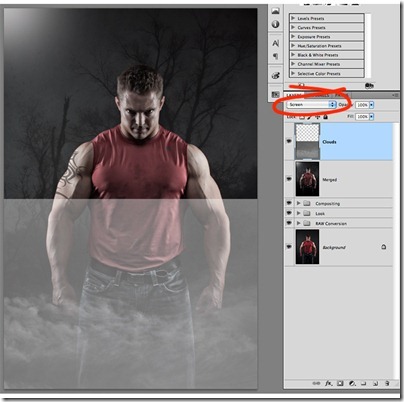
Step 3: Screen Blend Mode
With our cloud layer desaturated, the next step is to change the Blend Mode of this layer to Screen:
Step 4: Layer Mask
The 4th and final step is to add a white Layer Mask and then using a soft black brush, paint away the obvious outline of the clouds layer and lower the opacity of this layer to around 40(ish) percent.
So there you have it, a really simple, fast technique for adding realistic looking smoke/mist into your images…
Of course as is always the case with Photoshop, there are seemingly countless ways to create a similar effect but this is one that I favour because it makes use of real clouds and because of that I feel it gives a much more realistic final look.
Enjoy 🙂


I thanks for this awesome article, I am a autocad teacher and following your blog with my students