Easy Image Borders with Photoshop Smart Filters
It seems that nearly every third party plug-in these days has some ability to provide a variety of image borders, but so far that capability isn’t in Photoshop. At least, not directly. But, with this simple trick using the combined power of Smart Objects, Blend Modes, and Adjustment Layers, you can have a re-usable and customizable image border feature for use almost anywhere.
We’ll start with this image; we could use any image that could use a border:
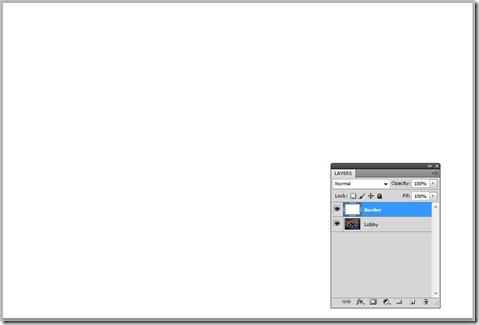
On top of this image, we’ll add a new layer filled with plain white:
Next, use the rectangular marquee tool to draw out an area and fill it with black – leaving a small white border all the way around. This will be the basis of our easy customizable border:
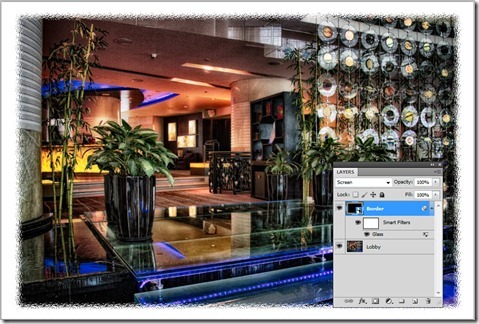
Now, what we want is to keep the white border, but drop out the black square. The easiest way to do this is to change the layer’s Blend Mode to Screen. Use the drop-down list at the top of the Layers Panel:
There we have a nice white border, very easily accomplished. But, we’re not done yet – by a longshot.
For the next series of steps, we’ll need to convert the Border layer to a Smart Object. Right click the Border layer in the Layers Panel, and choose Convert to Smart Object. You could also choose Layer > Smart Objects > Convert to Smart Object.
Notice the little badge that appears on the layer indicating it is now a Smart Object:
Why a Smart Object? Because that allows us to use Smart Filters! And, as you may recall from earlier tutorials, Smart Filters allow us to modify the parameters of the filter at any time. Let’s start by adding a filter to the Border Smart Object layer – we’ll use Filter > Distort > Glass. This opens the Filter Gallery and we see the parameters of the Glass filter. This filter distorts the edges of our black rectangle, where it meets the white border.
Note that even though the black is invisible due to the Screen blending mode, it is still there and available for us to modify with the filter. We’ll crank up the Distortion parameter to a healthy 10, and leave the Smoothness at a moderate value of 3:
Click on OK, and we have a bit of a rough edge to our border. Things are getting interesting, but we’re just getting started:
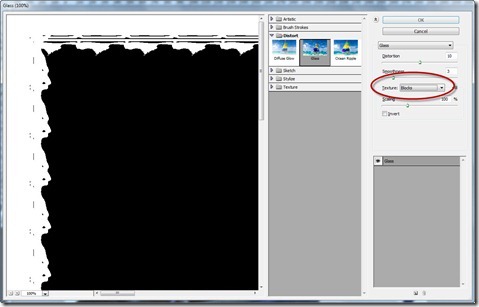
Let’s use the Smart Filter the way it was intended! Double click on Glass in the Layers Panel, and we’re right back to the filter gallery. Let’s change the Texture parameter to Blocks and notice the way our border is changing. Don’t click OK yet:
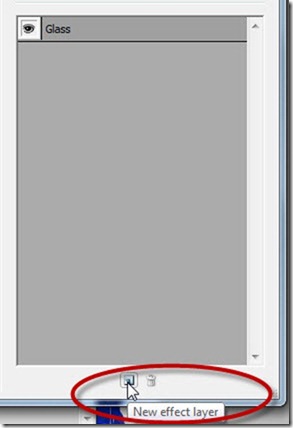
Next, click the icon at the bottom right for New Effect Layer:
This adds a second Glass filter on the first, and the effect is enhanced. We could stop here, but we won’t:
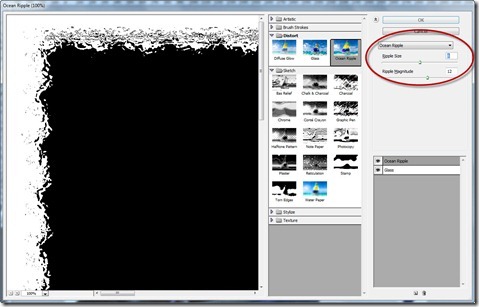
Let’s change the filter type of this new layer from Glass to Ocean Ripple. Set the Ripple Size to 8, and the Ripple Magnitude to 12:
We could keep going, adding new filter layers and changing the effects, but let’s stop here and press OK to see how our image looks:
Notice how Ocean Ripple pushes the pixels to the right, creating an uneven border. We could change this from Ocean Ripple to Spatter, with a Spray Radius of 15 and Smoothness of 5 to get this effect:
You could try dozens, if not hundreds, of variations on this theme of white borders. But, what if we need a black border? Thanks to adjustment layers and Blend Modes, the solution is only a couple of clicks away. First, the explanation.
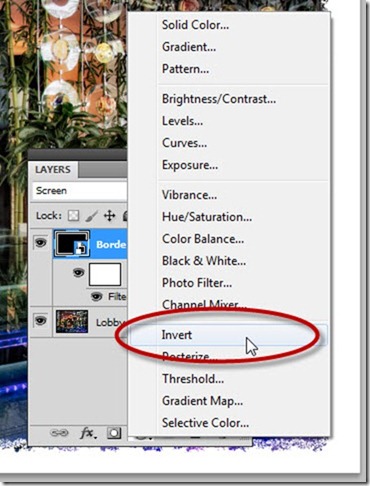
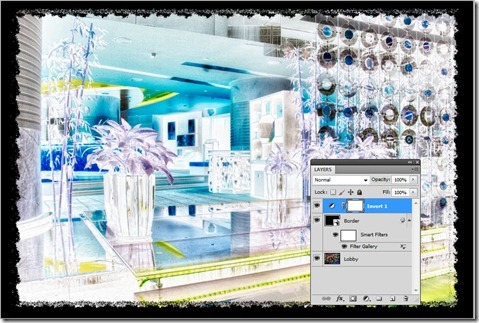
We will want the white to become black, but remain visible, and the black to become white, but remain invisible. We can invert the Border layer’s colors and change its Blend Mode from Screen to Multiply to accomplish this. Let’s start by inverting the colors. Add a new Invert Adjustment Layer by clicking the half black, half white icon on the Layers Panel and choosing Invert:
Here’s the result. We have our black border, but the rest of the image is hideous:
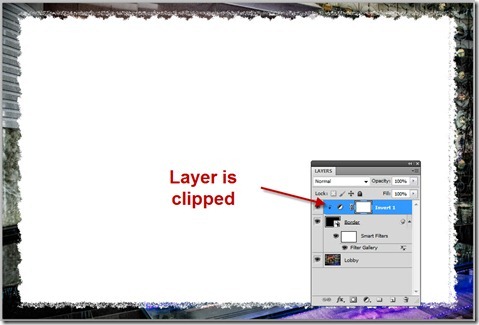
Now, we don’t want to invert everything – just the Border layer. So, we need to clip it to the Border so it only affects the Border. There are several ways to do this, but the easiest is Ctrl-Alt-G on Windows, Cmd-Opt-G on Mac, or choose Layer > Create Clipping Mask. The Invert layer now is indented with a small arrow icon indicating it is clipped to the Border layer:
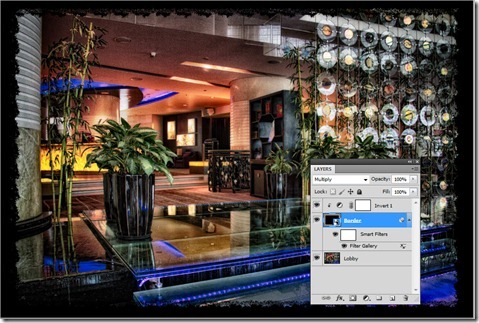
Now, we have the opposite effect with the Border layer – the border is invisible and the interior is opaque. This is because the colors are inverted. We can change the Border layer Blend Mode to Multiply, which will hide the white and show the black:
And, we have our black border! Now, to change from white to black, we simply click the eyeball on or off of the Invert layer, and change the Blend Mode from Multiply to Screen.
If you’re adventurous, you could even create layer comps to change from the white to black borders in a single click. And, you could drag the Border and Invert layers into any other document (resize to fit the new document) and you have easy, portable, customizable borders, with lots of variation available via the filter gallery.









This is an excellent tutorial. It is easy to follow and implement. I am working on a project that requires photo borders and your tutorial will allow me more creative freedom.