Dramatic Skies with Camera Raw’s Graduated Filter
On a recent Saturday morning, I was privileged to join some fellow NAPP members for a friendly “Canon vs. Nikon” shootout, at Fort Desoto Park in Saint Petersburg, Florida. The original intent was to compare the new 5DMIII against the new D800. Out on the beach, things got a little crazy, and a few of us took the term “shootout” literally! I was on hand to capture some of the hilarity.
This is the capture straight out of the camera, shooting with a 50mm lens, ISO 100, 1/100s at f/11. I wanted to add some drama to this image, to bring out the spirit of the skirmish on the beach dunes, so I opened the file in Camera Raw using Photoshop CS6. (Note: if you’re a Lightroom 4 user, you can follow along directly, as the controls are the same in Lightroom as in Camera Raw).
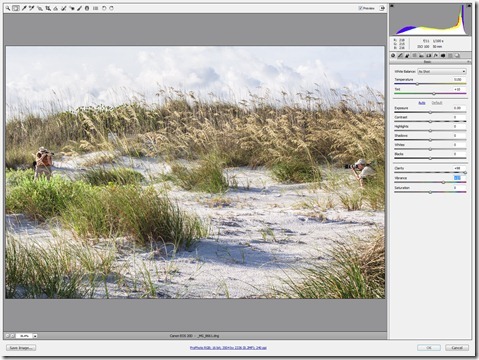
I went straight for the Clarity slider (the performance of this tool is really improved in CS6) and cranked it up almost all the way, to 98. I added some Vibrance as well, hoping to add some color to the sky. I ended up with plenty of pop, but very little in the way of color in the sky:
So, how was I to add some more drama to the sky? With the relatively unbroken skyline, the Graduated Filter came to my mind right away. Now, Camera Raw’s Graduated Filter is somewhat like a glass graduated filter you’d purchase and add to the front of your lens, except it has access to nearly every basic develop control in the Camera Raw arsenal.
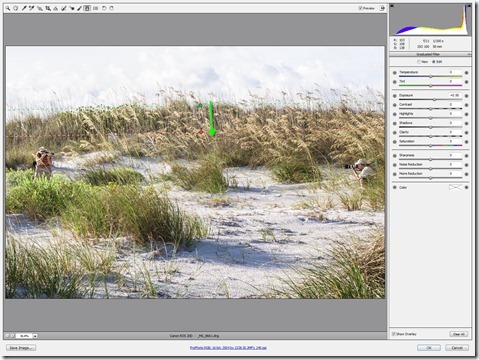
Clicking the Graduated Filter (Shortcut “G”) and dragging as shown by the green arrow gives us this as a first pass result:
This is no help, but we’re just getting started. The Graduated Filter is like a big adjustment brush, with a gradual fade. Everything above where we started to drag (shown by a dashed green line) has the full adjustment, and everything below the place we stopped dragging (shown by a dashed red line) has no adjustment. The area in between the two lines is a gradual fade out of the adjustments.
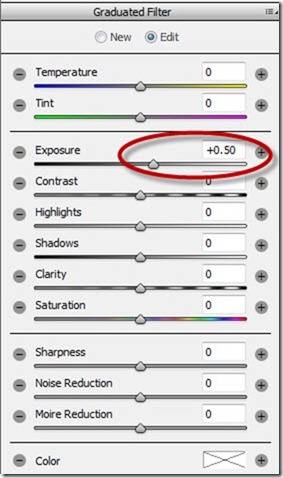
So, what adjustments do we have? By default, the Graduated filter adds an Exposure adjustment of +0.50 – that certainly isn’t helping our sky:
But, look at the amount of adjustments available to us! Let’s make some changes. We’ll return the Exposure to 0.00, and add lots more Clarity (100) and Saturation (76):
This has increased the detail in the sky, but the saturation just isn’t working to bring in the blue color. The sky is just a little too washed out. But, wait – the Graduated filter has more tricks for us!
Want blue color? Think White Balance. If we “cool” the temperature of the image, we will induce a blue color. But, since we’re working with the Graduated Filter, we can adjust the White Balance in the sky only. It doesn’t take much – we’ll dial the White Balance to –24 to impart a little more blue into the sky:
And there you have it, a dramatic difference in the sky. It may be a little overly blue for some tastes, but this sky, along with the extra clarity and edginess of the developing, fits my idea of the image I had in mind when we were having our little “camera brand competition.”
The point is, experiment! The Graduated Filter can add a lot more than just a positive or negative exposure to brighten or darken portions of an image. You have access to the all the basic develop controls, plus sharpening, noise reduction, and even a color overlay. And, you can add multiple filters one over another by clicking “New” at the top of the controls.
Give this a try, explore the possibilities, and add this important tool to your arsenal.


Great post, Mike! I love how the “shoot out” got so literal. 🙂 Looking forward to more of your posts. Welcome to the Livefyre community, and please feel free to let us know if you have any questions or feedback for us. We’d be happy to help!