Creating a Soft Focus Vignette in Photoshop CS5
For a prior tutorial, I demonstrated how to create a vignette effect around
the subject of a photograph, using Lightroom 3. Today we’ll take a look at a
subtly different technique, which is to create a “soft focus vignette”
around the central part of your image. It’s a trick I taught myself a while
back and for some images like the one shown in this article, I like the
effect it has of focusing the eyes on the central parts of the image,
without brightening or darkening the edges or requiring an extensive crop.
Step 1 – Duplicate the Background layer, then convert the new layer into a
Smart Object by right-clicking the highlighted portion of the layer and
choosing “Convert to Smart Object”. After a few seconds you should have a
small icon attached to your duplicate layer, showing you that it is now a
Smart Object (and soon to be a Smart Filter!).
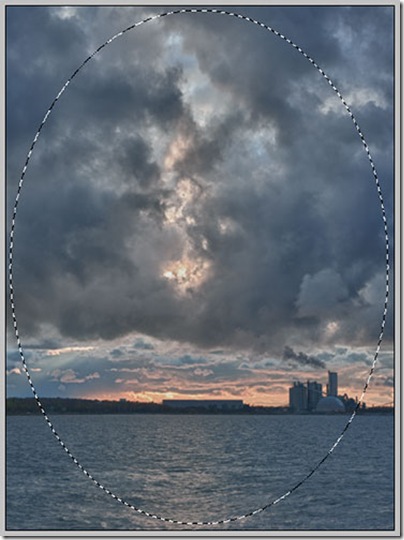
Step 2 – Select the Elliptical Marquee tool, placing the edge of the
crosshairs on the top and left boundaries of your image canvas, and then
click and drag all the way down, until the marquee edges are touching the
bottom and right boundaries of the canvas, then release. You should now have
an elliptical selection around the center of your image.
Step 3 – Press Command-Shift-I (Mac) or Control-Shift-I (PC) to invert the
selection you just made.
Step 4 – Choose Filter > Blur > Box Blur and with the Preview option active,
experiment with different slider values. When you find a blur amount that
you like, click OK to create the Smart Filter and accompanying layer mask
(the mask will be generated from the selection you made in steps 2 and 3).
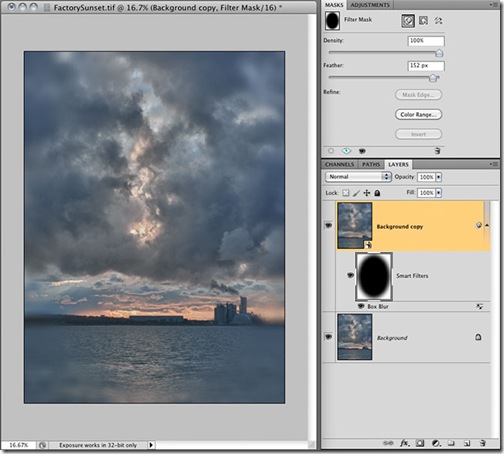
Step 5 – Select the Smart Filter’s layer mask, and then set the Feather
value in the Masks panel to a relatively high value. I typically set this
between 100 and 250 pixels to make sure there is a smooth transition between
focused and blurred areas, a well as to ensure the blur doesn’t cover any
important details. (Note that blur strength and mask feathering here are
made less subtle so they’re easier to see in the small screenshots.)
That’s all there is to it! When you finish you should see the result of your
feathering in the Layers panel when you view the mask, and the image will in
turn have a nice soft focus effect around its periphery. And because we used
a Smart Filter we can go back at any time and change the Box Blur value
without degrading image quality, and we can also change our mask feather
value anytime we like as well!


Excellent post. Thanks ………..
Fotoclipping.com
good work…
ClippingImages.com
my ellipse tool wont expand? It keeps just depositing a small round circle on the layer.
Hi Paula. Sorry for the late response… my notification email address was not delivering emails for the last month so I’m catching up on a backlog! 🙂 It sounds like your Marquee is set to the “Fixed Size” mode. If you look on the Options Bar make sure the Style menu is set to “Normal”, and that should give you the ability to drag out a marque that’s either oval or round.
Love it, love it, love it. Thanks very much for posting this!