Create a Simple Time Tunnel in Photoshop
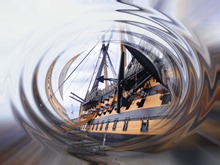
This month I thought I’d show you an easy way of creating a time tunnel or ripple effect effect using just a couple of filters and a little masking.
Step 1.
Open a photo in Photoshop, I’m using one of HMS Victory I took a few days ago. First duplicate the Background Layer by pressing Control & J, next select the Elliptical Marquee Tool and make a selection at the centre of your photo. Next choose Select>Inverse to invert the selection.
Step 2.
Select the Lens Blur Filter (Filter>Blur>Lens Blur>) and increase noise to 15%, set the distribution to Gaussian and tick Monochrome. This will not only give you a nice blur but will also add noise to the layer.
Step 3.
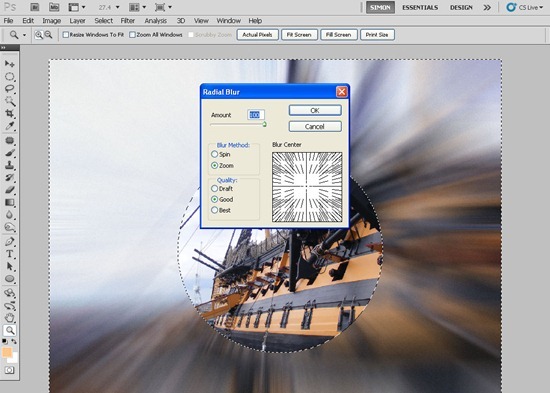
We now want to give the tunnel some depth so we select the Radial Blur Filter (Filter>Blur>Radial Blur) Set the Blur Method to Zoom, the Amount to 100% and the Quality to Good.
Step 4.
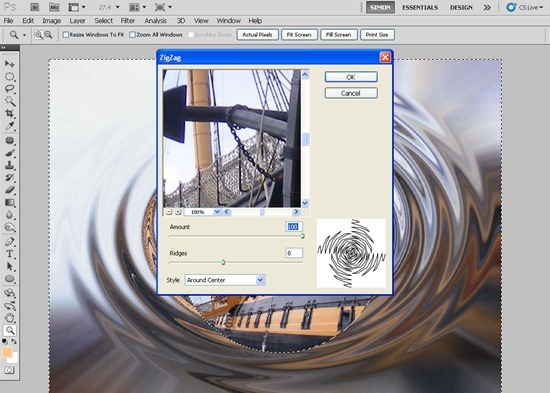
We now are going to use the ZigZag Filter (Filter>Distort>ZigZag) select the Style to Around Centre, amount to 100 and ridges to 8.
Step 5.
Press Control / Command & D to remove and selection, next Add a Reveal All Layer Mask (Layer>Layer Mask>Reveal All) Select a soft edge brush with the foreground set the black, reduce the opacity to 10% and trace around the edge of the circle to soften the edge.
I hope you liked this tutorial and please don’t forget to comment 😀


Great Tutorial !! I had fun doing it… thank you :))
I just tried it! Brilliant, thank you so much for this!