Correcting Cross Balanced Images in Lightroom
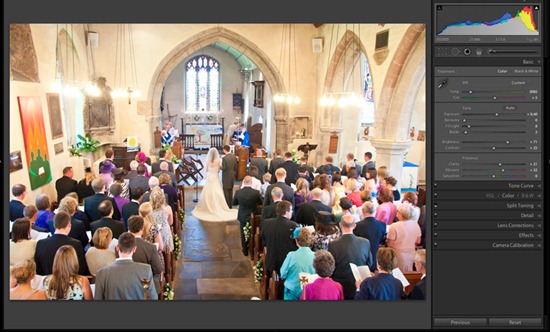
Ever had one of those images where whatever you do with the White Balance sliders in Lightroom you can never get it just right? Its a problem I get a lot working as a wedding photographer especially in churches where you can have a blend of umpteen light sources: such as daylight, daylight through old glass, daylight through coloured glass, tungsten, fluorescent and, God help you, sodium, and all at the same time. Now there are ways of correcting this in Photoshop using curves but if you’ve got many images to do this can be time consuming and rather denies one of Lightroom’s best points in that it is a one-stop-shop for editing and processing bulk images.
Anyway, I was having a rather vexed morning trying to get some images correct and after another bout of shouty-swearing at the computer (incidentally, this doesn’t help improve the image but it can be quite therapeutic) I started to think about other ways Lightroom helps you to control colours apart from the White Balance sliders. My first thought was to use the Hue, Saturation, Luminance and/or Color sliders. However the fine control of these sliders, which is normally their advantage, was for me a hindrance in this case as the casts are image wide.
So, another bout of shouty-swearing at the computer ensued. But this time I accompanied it with head, on table, banging. This may, or may not, have helped come up with my eureka moment which was… Split Toning! Obvious, really.
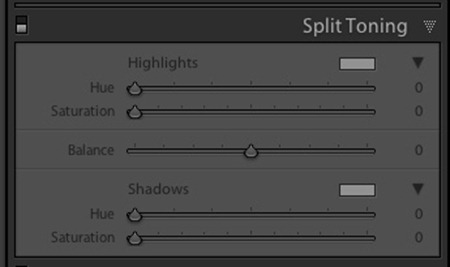
The Split Toning slider is a tool mainly used on black and white images and it adds colours to the highlights and shadows of an image and you can also adjust the effect to bias either the highlights or shadows. And, strangely enough, this kind of adjustment is ideal for helping correct cross balanced photographs.
I must make a proviso at this point as the process is not a panacea and it can take some time to get your head around the colour theory involved and correctly identifying the colour of the cast. Talking of colour theory, I ought to go through how that works in the correction process.
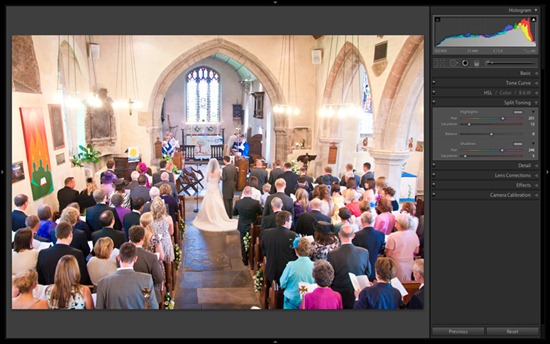
First, you have to judge what colour cast is affecting you image, in the image here the cast is greenish so the correction we have to apply is the opposite colour to that. So what is the opposite to green in RGB? Magenta as that is a mixture of the remaining two primary colours. This how the primary and their opposites work in RGB:
Primary – Red, red’s secondary = Cyan (combination of green & blue)
Primary – Green, green’s secondary = Magenta (combination of red & blue)
Primary – Blue, blue’s secondary = Yellow (combination of green & red, which doesn’t seem right but it is actually true)
Because these kinds of colour casts aren’t always specifically one or another of these colours it will take a little playing around to get the correction spot on. With the image here we have added a purplish/mauve colour to get rid of the greenish hue.
With the image here the cast is worse in the highlights than the shadows so the strength of the correction, controlled by the saturation sliders, is higher in the highlights than the shadows. The colour used to correct the shadows here is slightly different form the highlight one, but not significantly; in some images the casts can be quite different and if that is the case you can adjust them independently via their respective sliders.
When you have a significant difference between the highlights and shadows the balance slider comes into use. Because photographs generally aren’t just a mess of shadows and highlights you need control of the midtones too. The midtones will be affected by both correction colours but the will not necessarily sit nicely in the middle so the balance slider helps you hone the correction, one way or another to get the midtones spot on.
I hope you find this technique useful and would love to hear if it helps you solve a problem. Looking at the corrected image again it could be a little magenta. Oh well, better start shouting at the computer again.


Wow it worked! I tried this technique in Camera Raw though and it all went smooth without much shouty-swearing hahaha… it’s easier when sitting “on the shoulders of giants”! Thank you Rich.
You can also achieve similar results using the Lightroom paint brush if you need to correct irregular parts of an image. Useful in architectural interiors that need just a quick touch-up. I often use this to put back warmer glows to parts of rooms when the correct white balance has made it too cold.