Capturing Details with Refine Mask
Last week on TipSquirrel, I introduced the Masks Panel, and today we’re going to take a closer look at an old feature that is new again with CS5. A few versions ago, Adobe introduce the Refine Edge command, and in Photoshop CS5, the Refine Edge gains some incredible new capabilities, and also becomes integrated with the Masks Panel as “Refine Mask.” This feature allows us to improve the edges of our selections and masks, and (in my opinion) completely replaces the deprecated Extract filter.
In today’s tip, we’ll take a stab at extracting this screaming young lady, hair and all, from the blue background – using a layer mask and the Mask Edge / Refine Edge feature (image courtesy of stock.xchng):
In order to use the Refine Mask feature, we have to have a selection to begin with, and in order to make a reasonably good starting selection, I’ll use the technique described in my tip on Selecting with Color Range (if you’re not sure how to use this excellent selection tool, check the link). We start by choosing Select > Color Range…
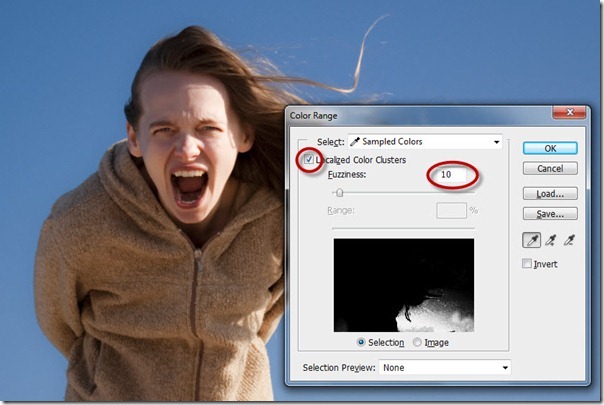
Make sure the Fuzziness is set to about 10, and Localized Color Clusters is checked as shown. Now, with the eyedropper tool active, hold Shift and drag in the blue areas of the sky to add blue to the sampled colors. Note that you may have to drag repeatedly over several areas to add the entire background to the selection:
At this point, we have a pretty good looking basic selection. But, remember the rule: Black conceals, and white reveals – in this case, our selection would reveal the sky while hiding the girl. The solution is to check the Invert option in the dialog box to reverse the colors:
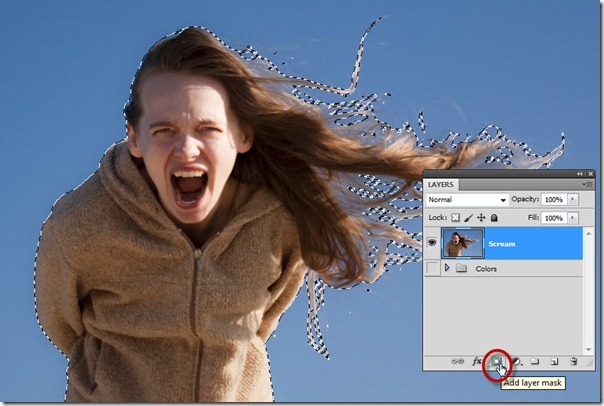
Now our mask looks good, and we can click on OK to exit the Color Range tool and leave us with the selection: Now, recall that when we have a selection active, we can add a layer mask and the selection will automatically define the mask. Click on the Add Layer Mask Icon (ensure that your layer is not the Background layer, as you cannot add a mask to a Background layer):
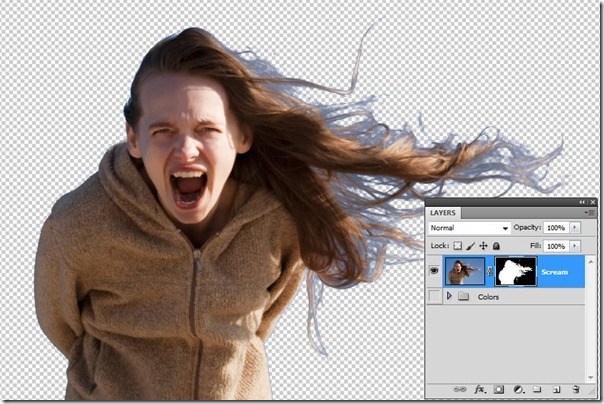
This leaves us with the apparent extraction, and we can see immediately that our selection is not perfect. Note the blue background that is still present, and the hair is not well defined at all. This is where we can call on Refine Mask / Mask Edge to help out:
Display the Masks panel (Window > Masks) and notice the option for Mask Edge… – this is what we want, go ahead and click it:
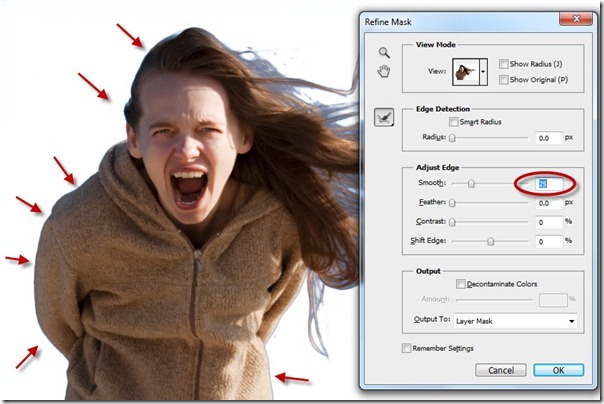
This will bring up a dialog box that looks a lot like Refine Edge from earlier versions of Photoshop – but with a few new (and, as we’ll see, very important) options. We’ll start with one of the legacy options in the Adjust Edge section, the option for Smooth – we’ll give this a value of 25, which has a favorable effect on the edges of the coat and head. If we bump up Smooth too far, we’ll start losing hair detail, so it becomes a bit of a tradeoff:
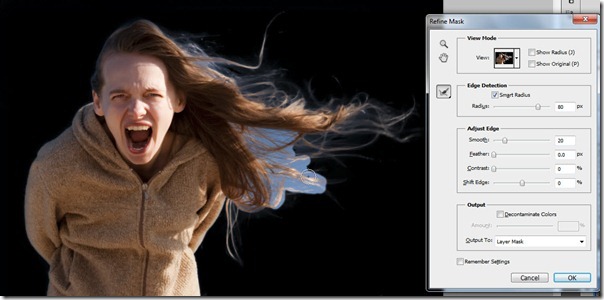
At this point, we can skip the remaining options in that section, and move up to the new Edge Detection section. We’ll move the value for Radius up to a higher amount, and watch the edge detection go to work. I found that a value of 80 did quite a bit to improve the hair, but at the same time we started getting some transparency in the coat area as indicated. We’ll fix that next:
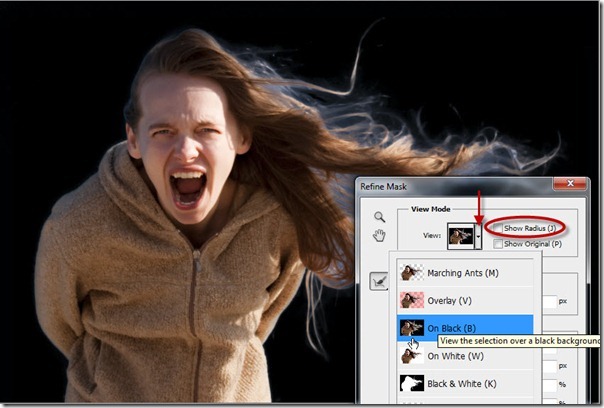
Before we fix this, let’s take a look at what this radius is doing. If you’ve ever used Photoshop’s older Extract filter, you’ll recognize this radius as the width of the green paint that you used to highlight the areas where you wanted the extract filter to find edges. This is the same, and we can see the effect by enabling the option Show Radius. Notice how the areas of the coat have an equally large radius as the hair, and this is confusing the tool a bit – and we end up with partially transparent areas:
Now, if we click the option Smart Radius, the tool analyzes the area and will constrict the radius in areas where it can do so without impacting any edges. This will improve the areas of the coat quite a bit:
Now we can uncheck the Show Radius and go back to the prior view. Note that we may be able to see the results better on black, or against our original image, and the View option gives us quite a few choices for how to see the results. Here I’ve changed to a black background:
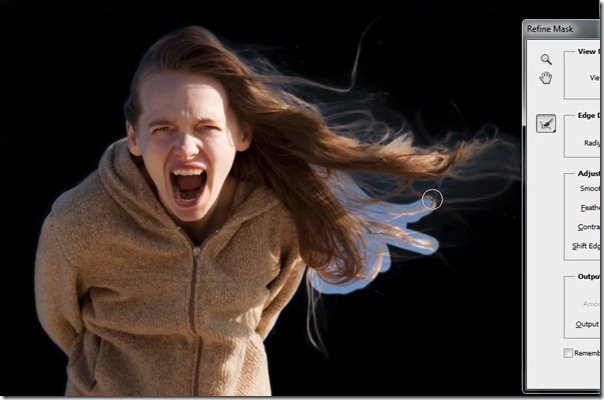
Now, let’s help our edge detection even further. Notice the small paintbrush icon next to the Edge Detection section. We can paint with the paintbrush to add areas for the tool to analyze, and we can Alt-paint (Opt-paint on a Mac) to remove areas from consideration. We can start by painting in the area of the hair to ensure we have the full hair covered:
Next, hold the Alt key (Option on the Mac) and paint over the areas near the edges of the coat to make sure they are excluded. Do not paint over the edge, but paint close to it to reduce the radius further. The mask results are already improving:
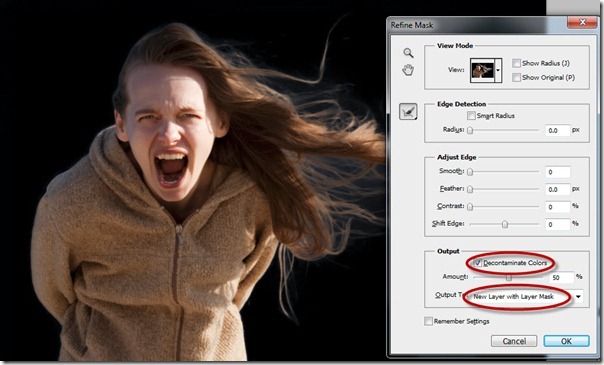
Once you’ve got it as good as possible, look to the Output section of the Refine Mask dialog, and ensure it is set to output to Layer Mask. This will ensure that all the changes are capture right in the original layer mask with which we started. Click OK to process the selection:
Now, once the process is complete, you can see that the results are good, but still can be improved – click once again on Mask Edge… and re-enter the Refine Mask command. Use the paintbrush tool again, and paint again over the hairs to refine them further. This will have a nice effect and will improve the mask further – yes, Refine Mask can be repeated to get even better results!
Once you’ve painted in the optimum results, there is yet one more step before finishing. Click on the Decontaminate Colors option. Notice how any remaining blue color is removed. The side effect here is that when you use Decontaminate Colors, you can no longer output the the same layer mask – you have to output to a new layer with layer mask:
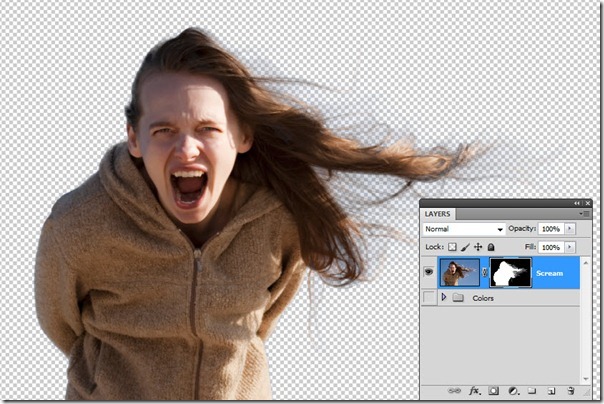
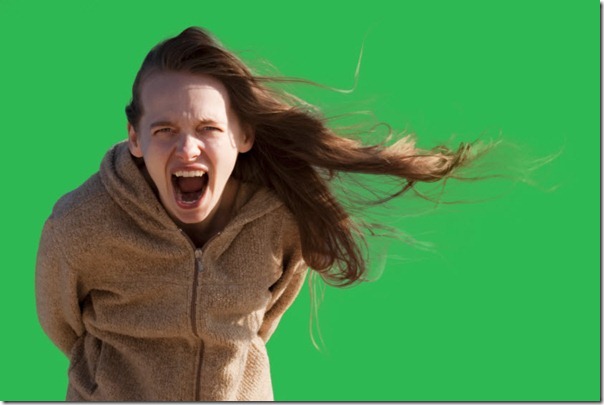
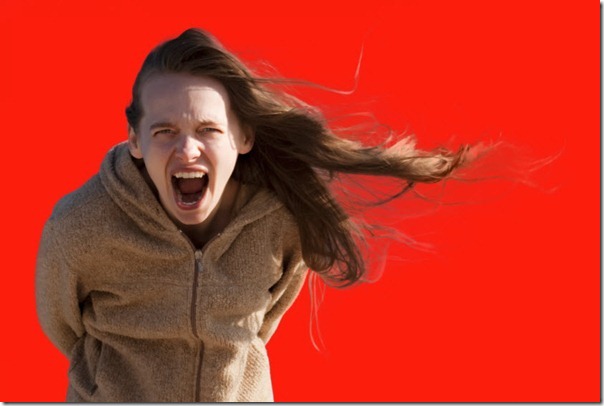
Once you click OK, you are ready to composite your image. A quick check of the image on various colored backgrounds shows that there is no blue contamination left in the hair:
And finally, a check of the mask itself (Alt Click or Option-Click on the layer mask to see it) shows the result of the Refine Mask tool:
Your layer is ready for compositing!
Today we’ve seen that the Refine Mask tool, an updated version of the Refine Edge command from previous versions of Photoshop, is quite capable of some amazing selection feats. You can use the command repeatedly to work on your masks, fine-tuning them iteratively as you go. Remember, too, the better mask that you originally start with (we used the excellent Color Range tool in this example) the better your mask will be.
See a video explanation of Refine Mask by Gavin Hoey Here












Just got CS5 a bit ago and I’m anxious to try this out. Looks like quite the time saver and yields great results. Thanks!
Nice tutorial. However, it will be quite a bit difficult with a more complex background than a plain blue sky.