
Adding Copyright Data in Bridge
Last week on TipSquirrel, we looked at a process for adding copyright metadata to your images using Adobe Photoshop Lightroom. Today, we’ll cover a similar process for those of you who are using Photoshop and Bridge to work with your images. We can make use of metadata templates just as in Lightroom, and we can use the Bridge Photo Downloader to help us to automate this process as we import photos. I will demonstrate this in Photoshop CS5, but the process will work with only minor modifications for CS2, CS3, and CS4.
We will first create a metadata template containing the copyright information we need, then we will see how we can apply this template as part of the import process.
Creating the metadata template
For this process, I recommend starting in Photoshop CS5, with a new blank document (select File > New and accept the defaults). Once you have the new blank document opened in Photoshop, select the command File > File Info… to bring up the File Info dialog box:

All the fields are blank, since this is a new document, and this gives us a nice clean slate from which to create our copyright metadata template.
Let’s go ahead and populate the field for Author, change the Copyright Status field to “Copyrighted,” add a Copyright Notice, and insert the Copyright Info URL. Do not close the dialog box yet:

Next, we click on the tab for “IPTC,” and notice here that the Creator field is already populated with the value from the Author field we entered previously. Any other relevant information that you’d like applied to every image can be included here if desired. Do not close the dialog yet:

Now scroll all the way down in the IPTC tab, and at the bottom we can see that the Copyright Notice is also carried over from the first tab. In the next field down, we can enter the Rights Usage Terms. Do not close the dialog yet:
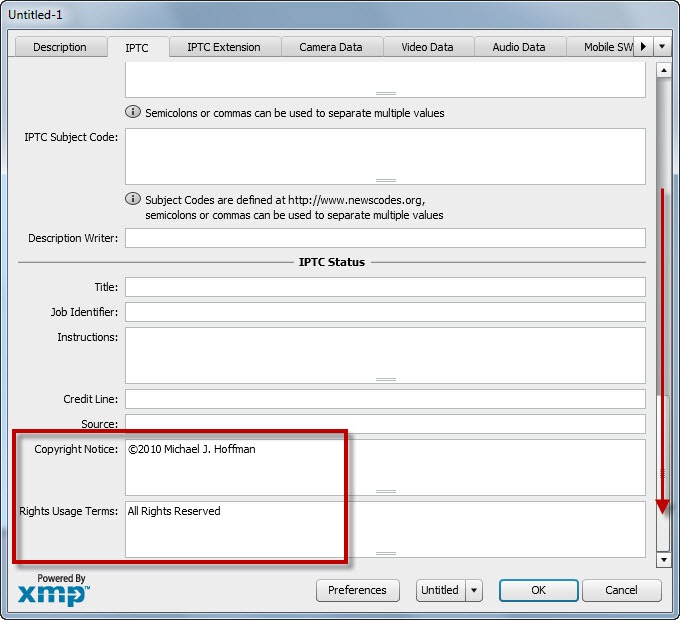
At this point, we have all the information we need for the basic template we will use going forward. We can save this as a template by looking to the bottom of the dialog box and finding the downward facing triangle next to “Untitled” (if you’ve created a template previously, you may see the name of your template instead of “Untitled”). Click the triangle to pull down the menu, and select Export…

In the save as dialog, we give the preset a name – I have chosen “c2010 MJH.xmp” – and click on Save.

Now, we can cancel out of the File Info dialog, and we can close the blank Photoshop document – we no longer need it. We now have a metadata template, let’s put it to use.
Applying the metadata template during image import
Now we will switch to Adobe Bridge CS5. Make sure your camera card is inserted, or your camera is connected, according to your usual preference, and select File > Get Photos From Camera…

Now, I’m going to recommend right off the bat, that we click the Advanced Dialog button, to get to the features we’ll need. Then, go ahead and select your camera or card from the Get Photos From: list:
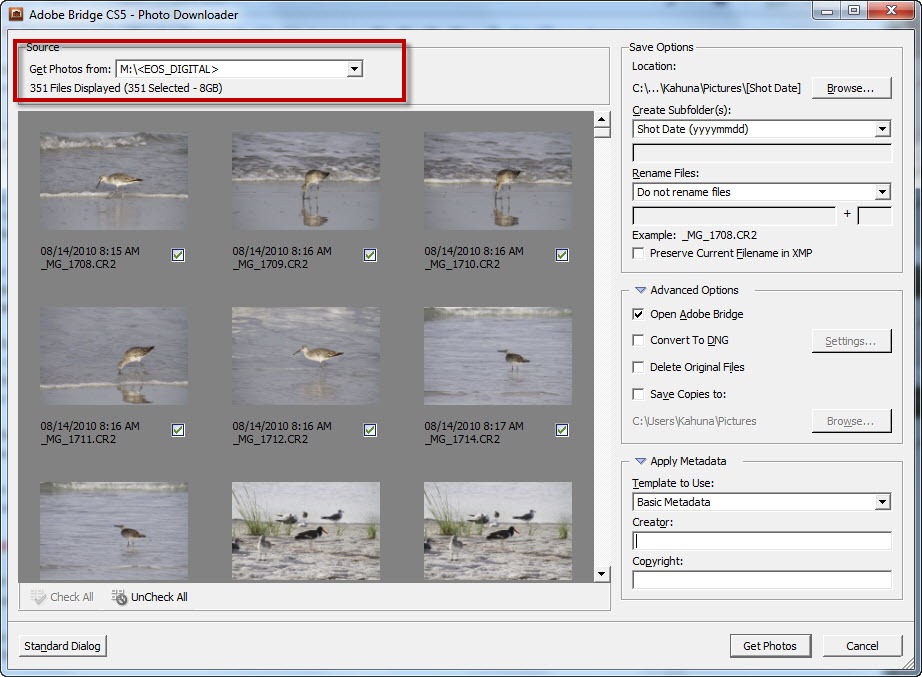
Go ahead and make your selections for location to save, subfolder, and renaming, as desired. Note also the Advanced Options section, which we’ll cover in another tip. But, finally, direct your attention to the lower right corner, in the Apply Metadata section:

Notice the default is set up for us to use “Basic Metadata” and we can enter values for Creator and Copyright. However, we can take advantage of our metadata preset here. Just pull down the list for Template to Use: and you’ll find the metadata template we created previously:

Once we’ve selected the metadata template, the value fields disappear as they are no longer needed – the data is pre-recorded in our preset.

At this point we can go ahead and click on Get Photos and our photos will be imported – with all the metadata embedded automatically.

Note that the settings in this dialog are “sticky.” If you’re not changing this data all the time, once you set up this way, you can forget about it, as you won’t need to revise the values again – until next year. On the other hand, if you regularly need to use different data for different jobs or projects, consider creating multiple metadata templates and selecting the appropriate one on import – it’s just that easy.


very clear instructions on how to set up a template. If I have many images which share the same keywords I set up a template which is another great timesaver. Once you know what you are doing it is very easy to set these up.
very clear instructions on how to set up a template. If I have many images which share the same keywords I set up a template which is another great timesaver. Once you know what you are doing it is very easy to set these up.
Hi, thanks for this information but when I click on ‘file info’ I have no general tab. I can’t get a copyright message to apply to my images. I use a Mac and CS5. thanks.
Sorry, a ‘description’ tab. Mine starts with IPTC.