Adding Contrast Using Lightroom Virtual Copies and Photoshop
I have to admit up front that the bulk of this technique is one I learnt from my buddy Glyn Dewis where he double processes a raw file using smart objects in Photoshop. The link to Glyn’s tutorial is here.
I read Glyn’s tutorial and found it very useful and wondered how best to achieve this using a Lightroom / Photoshop workflow and without the use of smart objects for those without the latest software. This method allows the user to go back and alter and edit non destructively at a later point.
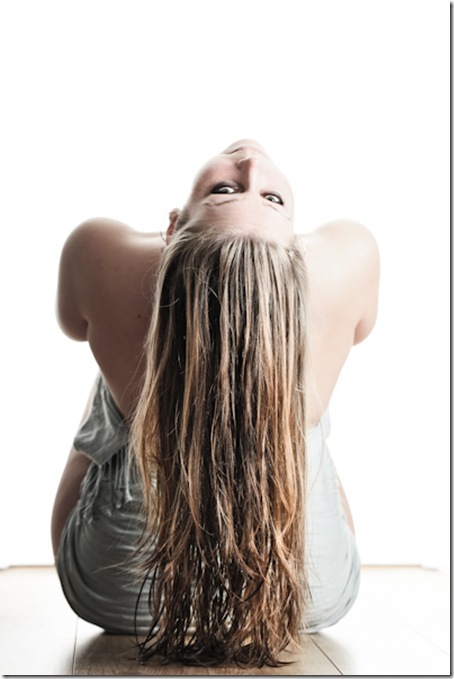
My starting image is nice enough but I wanted to add a little more punch to the hair, face and sarong.
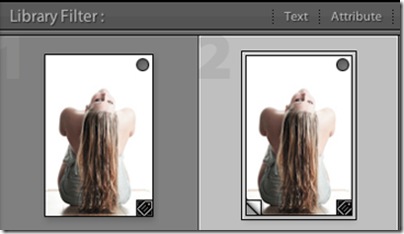
The first step is to select the image in the Lightroom Library module and right click to create a virtual copy of the image.
This should now display two copies of the same image, one with a little triangle in the bottom left corner to show it is a virtual copy
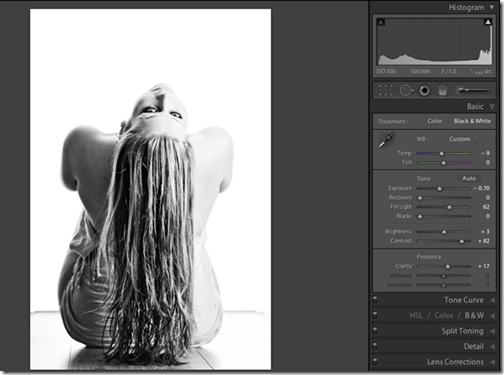
Select the virtual copy as shown above and press D to go to the Develop module. Once in the Develop module press V to change the image to B&W (NB! Pressing V again toggles back to the colour image). Edit the B&W image to increase the contrast.
As you can see in the Basic tab, I have lowered exposure, increased fill and increased both contrast and clarity. I also painted on a little more clarity to the hair using an adjustment brush. The finished B&W image has a strong contrast to it
So now we have the original image and a high contrast B&W image. We now need to load them both into Photoshop. One of the great features of Lightroom is its ability to load images to Photoshop in various different ways.. As smart objects, individual images and even layers within the same document. In this case we want to put both images into the same photoshop document as layers. To do this, select both images in LR, right click on an image and choose Edit In / Open as layers in Photoshop as shown below.
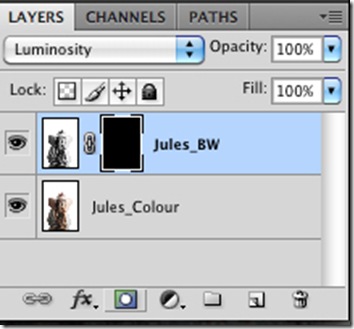
Once Photoshop loads, you should see two layers with our images. Move the B&W image to the top of the layer stack as shown below
and change the top layer to blend mode: Luminosity
you should now see that all of the colour image has a lot more contrast, but in this case I want to selectively apply the contrast. So I apply a layer mask by holding Alt and clicking on the layer mask icon at the bottom of the layers palette. Holding the Alt key while creating the layer mask fills it with black so that none of the B&W layer affects the Colour layer.
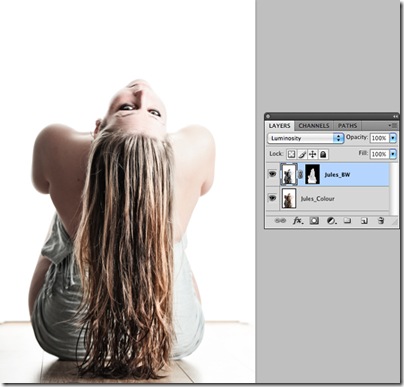
Now choose a soft edged brush and paint white onto the mask where you want to contrast to show through.
You may well find that the level of contrast is too strong, this is easy to correct by simply lower the opacity of the B&W layer
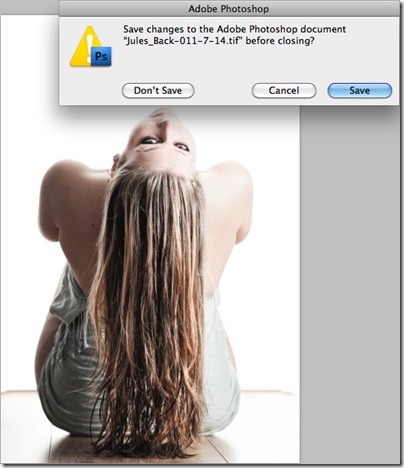
Save your changes in Photoshop
and open Lightroom to find your original 2 images and your new high contrast image
NB! I selected all three images and pressed N to display in survey mode
Here is the final image
You might note that I did not flatten the layers before saving, this allows you to go back and fine tune your edit if required.
As always, please feel free to add any comments or questions and I’ll do my best to answer them.








How does this differ from increasing the contrast in Lightroom?