A Look At Photoshop Plug-In – OnOne Perfect Resize 7
 Newsflash! I love OnOne Software’s Perfect Resize 7! I’ve gone on for years about the resizing wonders of Genuine Fractals, and that hasn’t changed just because the name has; in fact, now there’s even more to love!
The resizing power of Perfect Resize 7 (PR7) is better than ever. To get the best results in Genuine Fractals, I used to go up to 200% resize, then another 200% in Photoshop. 400% was nothing to sneeze at, but that was just about all I could do with most photos and have it still look great. With the improved algorithms, I can go 400, 600, even 800% without ever leaving PR7.
I’ve even gone up 1200% on occasion! Oh yes! I even went there! That alone would be worth the price to me, but there’s even more to love…
Let’s look at some of the features of PR7. First, once you have PR7 installed, how do you find it inside Photoshop? One way is to go to the File menu, then move down to Automate, and choose either PR7 or PR7 Batch if you have a large quantity of photos you’d like to change in the same way.
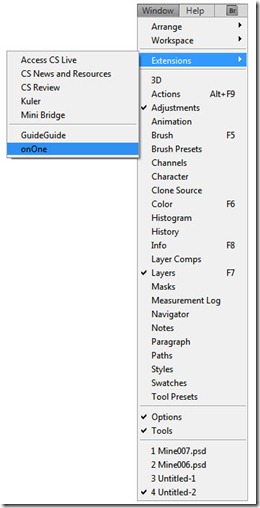
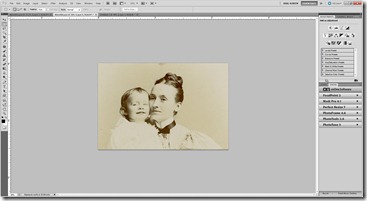
Another way to access PR7 is in the OnOne Panel. You’ll find it in the Window menu, under Extensions.
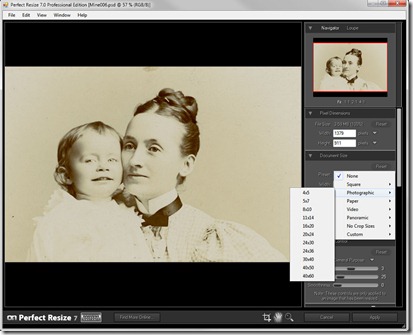
When you open PR7, at the top left is the Navigator panel; if you need to be up real close to make some detailed adjustments and would like to change the focus point really quick, just use your curser to move the red square in the Navigator to the area you want to focus in on. Very cool and very handy!
The next tab in the same panel is the Loupe. With this you can have the main window at 100% and use the Loupe to see an area enlarged up to 800%; helpful if you’re making adjustments with the grain, sharpening or texture features and you want to see how the adjustments will affect a certain area up close. The loupe gives you an instant 100% preview of the resized image quality!
The next two panels are the areas where the resizing magic happens (yeah, I can’t believe I used that one, either!). The first area, Pixel Dimensions, is where you can change the file size by either Pixels or Percentage. For instance, if your file is 3.59 MB at 100% and you increase it by 200%, the file size increases to 14.38 MB. This is a good way to keep an eye on how large your files are getting while you’re increasing the overall size.
Next up, or down in this instance, is the Document Size panel. Here, you can change the size of the document by pixel, percent, inches, mm, cm, points or picas. You can also resize by preset dimensions. One thing about this feature is that it will crop the photo, not actually resize it. You can move the area that you’d like cropped, though, so you do have some control over the process. Obviously these presets are a great way to crop your photos for common frame sizes!
In the next three panels you can make some adjustments to the photo right inside PR7. Admittedly, these adjustments work better on newer photos than old, but it’s always good to try, right? I won’t go into them in depth, but the three adjust panels are Texture Control, Sharpening and Film Grain. Sharpening is particularly useful for minimizing artifacts when resizing from a small source file. Don’t be afraid to move the sliders to your heart’s content, as in all the panels there’s a reset button at the top right to take everything back to where you started.
Next is the Tiling feature. I love this one! This is great when you have a very large photo you need to print, but your printer isn’t very large; with Tiling, you can section the photo and print the sections in your printer and piece them back together. You can even adjust the amount of overlap to make the piecing together easier. You’ll find this feature handy if you need to show (or see for yourself) a soft proof of your photo. It would also be a great way to break a large photo up and print it in smaller sections to put in individual frames.
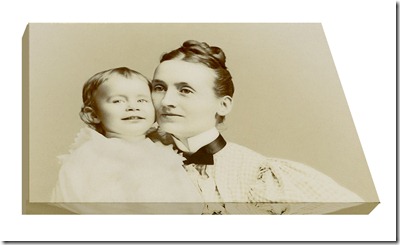
The improved gallery wrap feature is awesome! You get a little preview, now, of how the gallery wrap will look.
Gallery wraps are an awesome way to print your photos on canvas and have them stretched in a way that you can hang on your wall, sans frame! Looks great, costs less – win/win!
While it used to be a Photoshop plugin, anly, but nowPerfect Resize 7 works with Photoshop, Lightroom, Aperture and as a stand alone application; so now you don’t have to have the big software to take advantage of Perfect Resize!


Thank you for this excellent review! You answered all my questions!
I HAVE A NIKON 200, WOULD LIKE TO MAKE A 16X 20 OR BETTER.
I ALSO HAVE SOME PROBLEM W/ CHROMATIC OR COLORED DOTS ON BLACK DINNER JACKETS AS A EX SAMPLE, WILL PERFECT SEVEN HELP SOME OF THIS?//WHAT OTHER SOFT WARE WOULD YOU SUGGEST.
USING I MAC 24 ” 3/4 TERABYTE
HAVE LIGHT ROOM ALL READY INSTALLED 3.2.
THANK YOU—-RUSS