Easily Add Bruises
Step 1
Open your photo you want to add bruises too, I’m going to be using one of me (handsome devil aren’t I 😀 – Btw check out the beard project – here ). We will be making this into a map to run the displacement filter with later.
Step 2
In the Layer Palette grab the layer with the face on and while holding the ALT key drag it to the New Layer Icon.
In the duplicate layer dialog box (that should appear) choose “New” from the Destination Document drop down list
Step 3
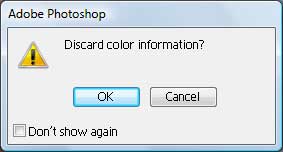
A new document should have appeared – we want to first make it greyscale. We do this by going to Image > Mode > Greyscale. When Photoshop asks if should “Discard Colour information” click OK.
Step 4
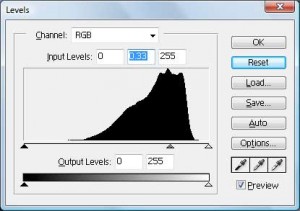
Next adjust the levels (Image > Adjustment > Levels) to make the picture a lot darker, I used the settings in the picture below.
Step 5
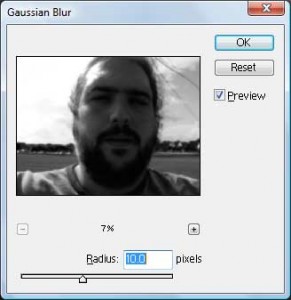
Finally we blur the hell out of – Filter > Blur > Gaussian Blur > 10 pixels, then save the document as map.psd. Finish by closing the document and returning to your original document.
Step 6
Next we open up an image of clouds – the one I used I will put up for download. We drag this over to our face picture and line it up.
Step 7
Make sure you are on the cloud layer and that it is above the face layer.
And locate the map file we made earlier and click open

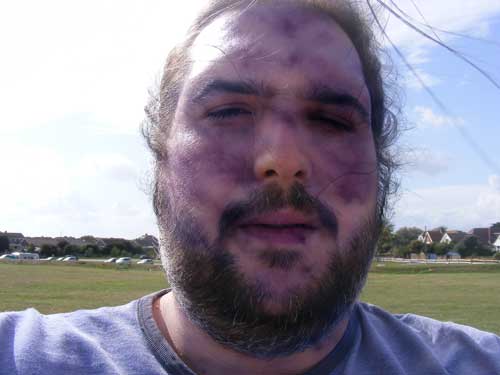
The cloud layer will be altered slightly, change the settings if you use a different picture.Step 8 The last step distorts the clouds layer so the texture fits the contours of my face. Change the cloud layers blending mode to softlight and suddenly it looks like I’ve lost in a fight.Click To Enlarge
Step 9
Finally remove any of the excess texture from the cloud layer – either using the eraser tool or with a layer mask using a soft edged brush and adjust the levels to remove the white
you can download the psd file from Here
Hope you enjoyed the tutorial – please feel free to contact me at Mail@simonrudd.info if you have any questions or wish to show me what you’ve made
Find me on Twitter
Please go here if you wish to contact me for work
My Blog updated daily
More of my tutorials Here


Leave a comment