
X-Ray Double Exposure in Photoshop

In this tutorial we’ll learn how to us the power of Adobe Photoshop to create a cool X-Ray style double exposure image showing the outline of the outside of a building, but revealing what’s on the inside. You’ve probably seen this effect employed differently before, but this is my new take on it.
This tutorial relies on a prior understanding of making selections and of working with layers, so if you need a refresher then take a look here for selections and here for layers.
First off, we need to find or make two fitting images. In this tutorial I’m using St. Pauls, which I was lucky enough to be invited to shoot last year. I’ve selected two of my images which can compliment one another when overlaid, which is key to success with this technique.


My consideration when choosing these two images from a whole bundle of options was their similar perspective and similar make up, in that the curves and lines correspond quite well.
First off, we need to load our ‘outside’ image into Adobe Photoshop and make a selection of it. Once we’re made the selection we need to invert it – CMD + Shift + I (Windows: Ctrl + Shift + I)
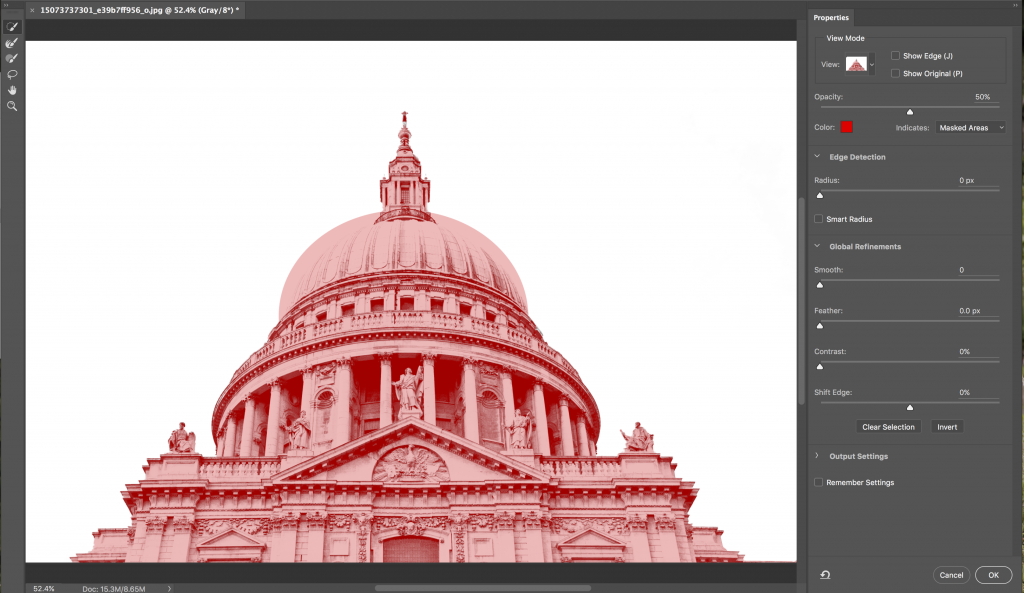
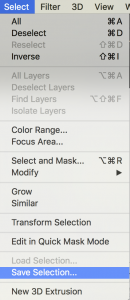
With the selection now inverted we can save the selection to refer to later. To do this go to SELECT > Save Selection and then name your selection so it’s easy to find and click OK.
Now we’ve saved the selection we can move on and bring our internal image into play. Load it into Adobe Photoshop and have it sit in a new Layer above the external image. It’s placement isn’t important for now, we’ll deal with that later.

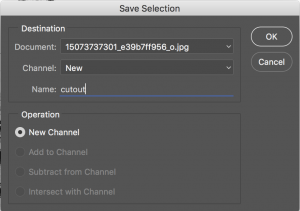
Next up, we need to add another layer on top. Add a new layer with CMD+Shift+N (Windows Ctrl+Shift+N) and use the Paint Bucket Tool (G) to fill it with a colour. I’ve picked a relatively neutral and non-distracting colour. When this is done we need to load the selection we previously saved. In the Menu select SELECT > Load Selection and you’ll be presented with this box.

We need to select the correct selection, in this case ‘cutout’, and click OK. We’ll be taken back to where we left off, which is the top layer, and our selection will appear on the screen. Ensuring that it’s the inside of the building edges selected (if it’s not, just invert the selection with CMD+I (Windows Ctrl+I)) we can delete the selected part of the top layer, revealing the building interior on the layer below. Press Delete/Backspace.
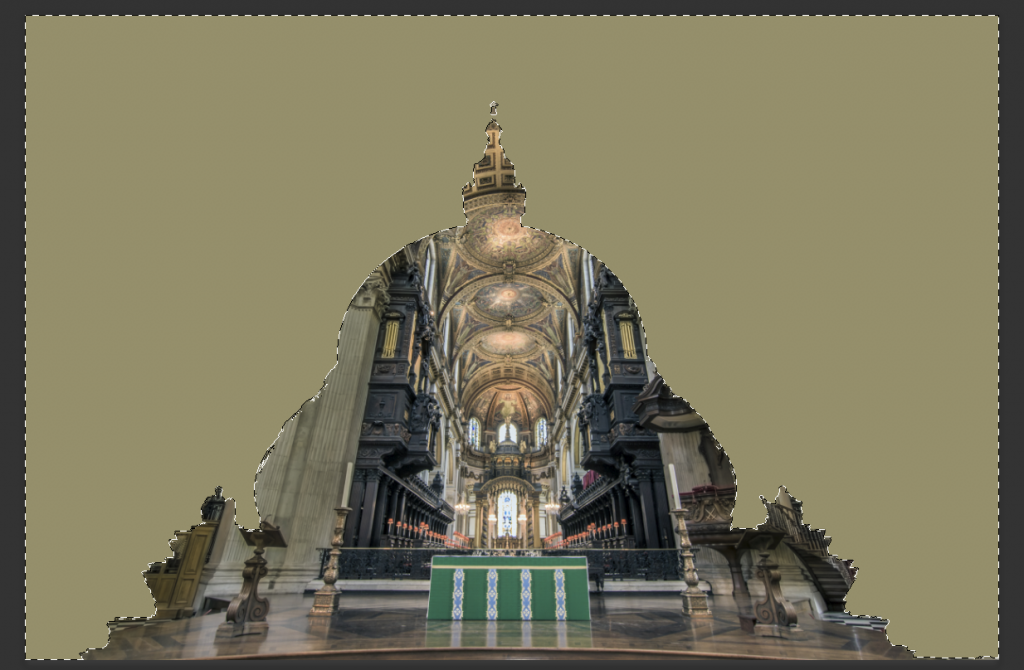

As you can see, there is a discrepancy in the alignment between the cutout and the interior. Remember that the cutout is based on the building exterior, so we need to keep that where it is and do any repositioning that’s required on the interior, the middle layer. With the middle layer selected in the Layers Panel, select the whole image with CMD+A (Windows Ctrl+A) and then hit the V key to select the Move Tool. Now we can drag the image around to line it up with the cutout.

With this step we’re almost finished. The last job on the list is to reveal the exterior. To do this we need to select the background layer and duplicate it with CMD+J (Windows Ctrl+J) and put this new layer at the top of the stack in the Layers Panel. Then we can use the Opacity Slider to make this top layer gradually more transparent until it’s reached a point that works aesthetically for our image. I’ve ended up at 70%.

And we’re done! That’s how to make a cool X-Ray double exposure effect image using Adobe Photoshop. If you try it out, I’d love to see your results, share it with me on Twitter.

I have no idea about x-ray double exposure but i get more information to the post. Thanks for sharing a good topic.
I hope you enjoyed the tutorial Amzad