
Type Tips for Photoshop CS6
Photoshop CS6 comes with a few type tricks up its sleeve, and if you find yourself working with type a lot in Photoshop, especially if you are mocking up print layouts or web pages, you’re going to get a lot of mileage with these new features. Let’s take a look.
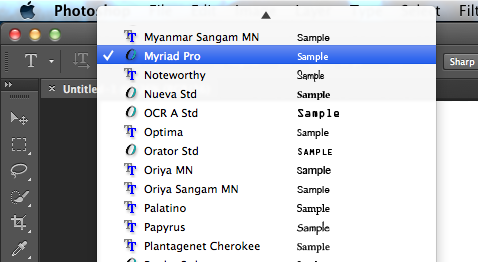
We’ll start with the fact that Photoshop now has an actual Type menu! Within the Type menu, Adobe has gathered all of the functions related to working with type, and has added some new ones as well. The first on we’ll discuss is the Font Preview Size option. If you’re using the type tool and open the font selector from the Toolbar, you’re used to seeing tiny font previews, like this:
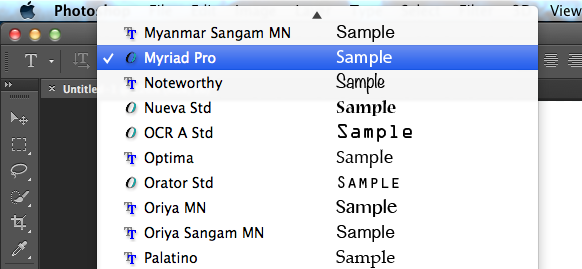
However, if you take a look under the Type menu, you will see that you can change the font preview size from its default of Small (you might call it “Tiny”) to one of four larger sizes:

Choosing even the middle size of Large provides a much more readable list of fonts for those of us whose eyesight may be less than it once was. Nice!
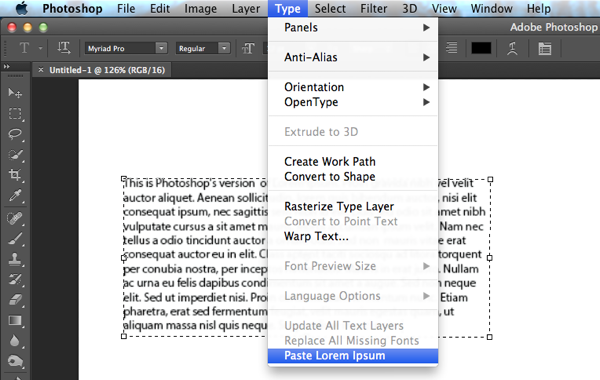
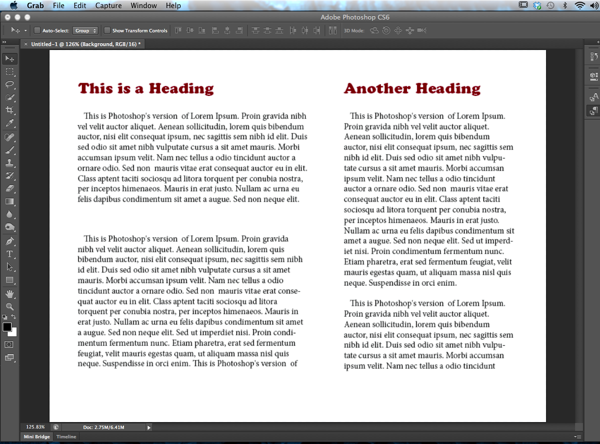
Next, we’ll look at something that may be a great benefit when your mocking up a layout. Photoshop now has Lorum Ipsum placeholder text built right in. How’s that for convenience? Just drag out a text box using the Type tool, then choose Type > Paste Lorum Ipsum. A block of text is automatically inserted into the text box:
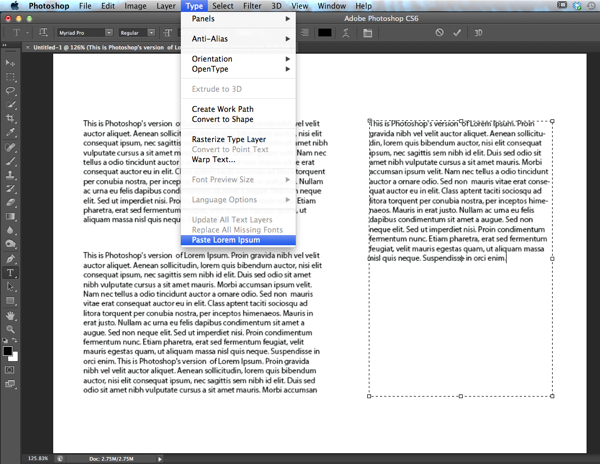
This allows you to work rapidly to lay out some placeholder text, without even having to copy and paste from another source. Note that the placeholder text is only so many characters, so if you have a large text box, you’ll have to repeat the command multiple times to fill the box. Hopefully, this will be addressed in a future release:
Once the text is in position, Photoshop CS6 has another cool new feature that allows us to continue to work on our layouts in a more streamlined and flexible fashion: Styles. Photoshop now has both Character and Paragraph Styles built in – for this tip, we’ll focus just on Paragraph Styles.
Let’s start by selecting the background layer (so that no text layers are currently selected). Then, choose Type > Panels > Paragraph Styles Panel (you can also choose Window > Paragraph Styles). The Paragraph Styles panel opens up, and we see the “Basic Paragraph” default style. Click the icon at the bottom of the panel to Create a New Paragraph Style:

This creates a new style based on the basic paragraph, called “Basic Paragraph 1.” Double clicking that will open the Paragraph Style Options dialog, where we can make the changes shown to create a body text style:
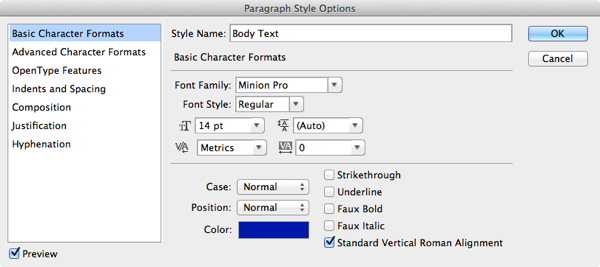
We can change the name of the style to Body Text, the font style to Minion Pro, the size to 14 point, and the color to a deep blue. Clicking OK updates the style, but this isn’t applied to our document’s text yet.
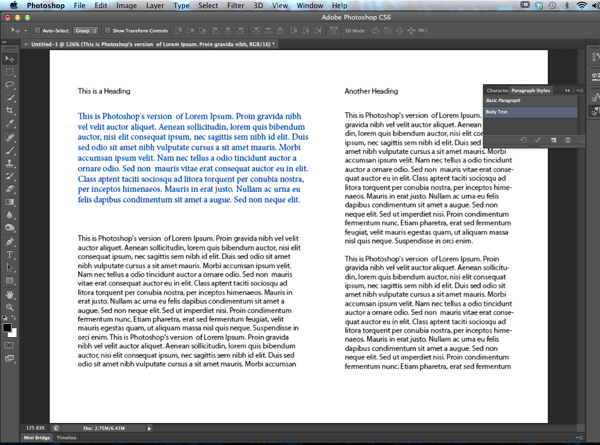
Let’s click on the first text layer we created, and then click Body Text in the Paragraph Styles panel. Notice that the style of the text is updated immediately. If you don’t see a change, try clicking on the Basic Paragraph style, then back to Body Text:
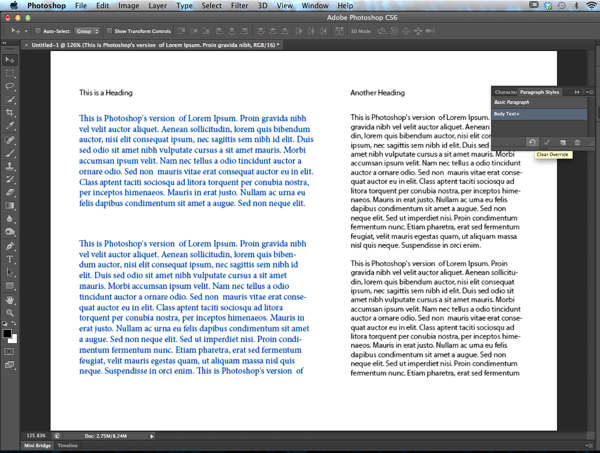
Continue through the document updating the three body text layers. If you see a “+” sign appear after the text style, and it doesn’t appear to be updated, click the Clear Overrides icon in the Paragraph Styles panel:
Now, let’s create a heading style. Again, select the background layer to avoid making changes to any existing text layer. Click the Basic Paragraph style, again choose Create New Paragraph Style, then double click the new style to open the Options dialog box as before. Make the following changes:

We now have a Heading style with CooperStd font, 24 point size, and a dark red color. Choose the two heading layers (you can shift click to select multiple layers) and apply the new style by clicking in the Paragraph Styles panel. Again, click Clear Override if you see the “+” icon after the style name:

Now, here’s where the benefits really come in. You’ve reviewed this layout, and the client wants the body text to be indented on the first line, and wants the color changed back to black. Rather than going through every body text element in the document, just double click your style in the Paragraph Styles panel. In the first panel, change the color to black:

Next, choose the fourth item from the list on the left – Indents and Spacing. Change the first line indent to 10 points, like so:
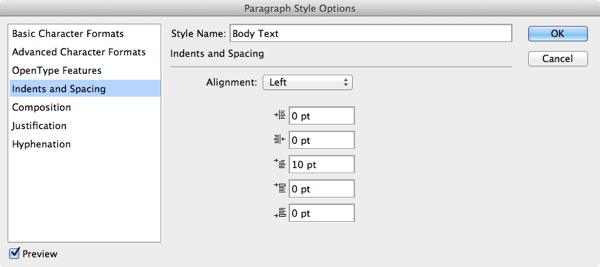
And like magic, all the text that has the Body text style applied is updated immediately. This is a real time saver if you’re working with lots of separate text objects in a structured layout or mockup.
While Photoshop isn’t a text layout tool in the class of Indesign or Illustrator, it is nevertheless the tool of choice for many designers who are tasked with creating concepts and ideas. With the new enhanced type capabilities in Photoshop CS6, designers have more flexibility and the means to a more efficient workflow. The Paragraph Styles are still a little creaky, and don’t always work as expected – hopefully this will get shaken out during the beta phase – but this is definitely a step in the right direction. Give it a try for yourself!


Increasing the display size of type affects the number of lines shown in the display, but not like you might expect. I get more lines of type display with huge than I get with large!
I downloaded several fonts from dafont.com. I have been trying without any luck to change the color of the font when I use them. It automatically switches the color back to gray no matter what color I choose. What am I doing wrong?
Thank you! I was looking in the “preferences” section to find the old way to enlarge the font and couldn’t find it (previous to CS6). So easy once you know where it is! Thanks for the tip!!!
Now if there was only a global find and replace across all open documents life would be complete.