Easy Grunge Border in Photoshop
There are times when all you want to do is dive into Photoshop, create a quick effect and move on. So if that’s you and what you need right now is a quick grunge border read on, because I’ve got the perfect tutorial.
Step 1

Open your image in Photoshop and press CTRL+J to duplicate the background layer. Switch off the visibility of the new layer and click the background layer to reactivate it.
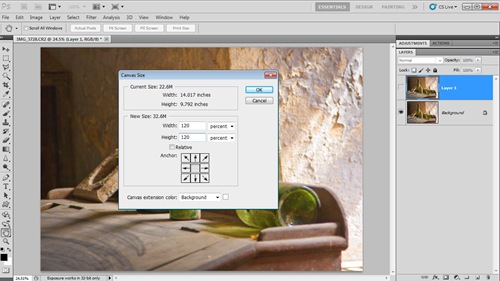
Press D to reset the foreground and background colours and then click Image – Canvas Size. Change the units to percent and enter a value of 120 for both the width and height before clicking OK.
Step 2
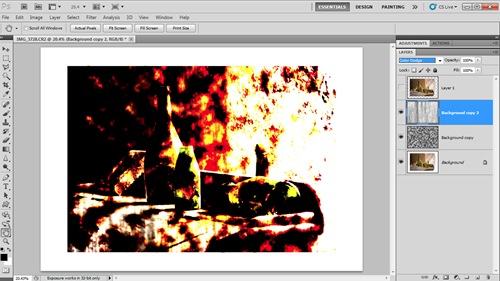
Press CTRL+J to duplicate the background layer. Then click Filter – Render – Clouds. and change the blend mode to Color Burn. Press CTRL+J to duplicate the clouds layer and then click Filter – Render – Fibres. Use a Variance of 5 and a Strength of 1 for the settings and then change the layer blend mode to Color Dodge.
Step 3
Toggle back on the visibility of the top layer (layer 1) and click Layer – layer Style – Stoke… Use a size of around 50 pixels and change the position to Inside before clicking OK.
Finally click the background layer to make it active and click Filter – Blur – Gaussian Blur. You’ll need to use a very large setting to see the grunge appear, but the bigger the setting the further the grunge spreads.
Step 4
Press CTRL+SHIFT+U to make a mono grunge border. If the grunge is too small or is missing from one side, paint black on the background layer with a soft edged paint brush. The bigger the brush the further the grunge border will extend.


It was really excellent post! Thanks a lot for sharing..