
Automatically Stack Lightroom Images
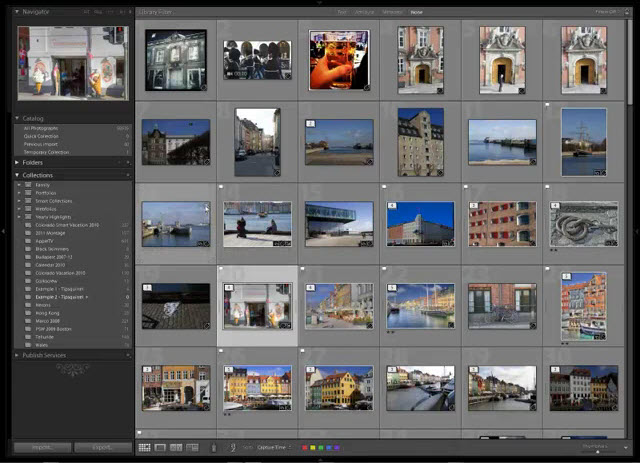
Catalog views within Adobe Lightroom can be daunting, particularly when you have a folder filled with many files. On a recent expedition with my friend Eric, the TipSquirrel himself, I managed to take over 500 images on a photo expedition. A look at my catalog in grid view and you can see why – I’ve got a huge number of bracketed images that I captured, intending to create HDR renderings.

Having this many images and having to scroll through them all to get around isn’t the most practical undertaking in the world. However, Lightroom has an excellent feature that will allow us to be a little more frugal with screen real estate, and still see our images: Stacks. With a Stack of images in Lightroom, the photos are treated like a physical stack – one image is at the top, and the rest of the images are hidden beneath it, as if they were literally stacked.
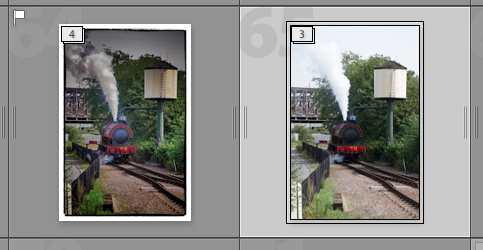
For example, if we select and highlight three images in an HDR bracketed group (one center exposure, one over exposed, one under exposed) we can choose the menu command Photo > Stacking > Group into Stack (or just press Control-G on Windows, Command-G on Mac) and the images are stacked together:
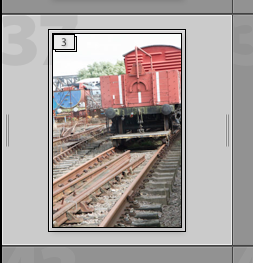
Notice the small number that indicates there are 3 images in the stack. Clicking the vertical bar at the side of the top image will “expand” the stack so you can see the underlying images, and clicking it again “collapses” the stack:

This can be a very good thing – if we were to stack all the bracketed images, we could browse by simply looking at one image per series. Then we could expand any stacks that we are interested in working with.
However, Lightroom has a way to automate this process. If we choose the menu command Photo > Stacking > Auto-Stack by Capture Time… we get this dialog box:
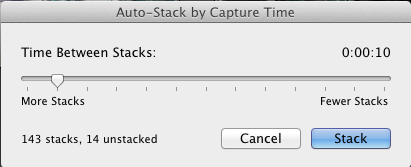
Here we can use the slider to determine the elapsed time between images. If the elapsed time between two images is below the value of the slider, the two photos will be included in a stack. Subsequent photos that are also spaced out in time by an interval less than the given value are also added to the stack. You can move the slider to set the value from 0 seconds to up to one hour. So, you can not only stack rapid fire bursts such as my HDR brackets or sports photography, but even series of images spread out over a longer time.
Essentially, the greater the interval, the fewer stacks (but each stack will contain more images). The smaller the interval, the more stacks (each stack contains fewer images).
In this example, we’ll set the value to 3 seconds, and see what we get:
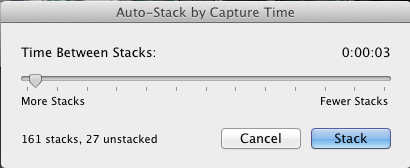

We have 161 stacks – and 27 images not in stacks. That was much easier than doing the job by hand! Butm we need to make things easier to see – and to do that, we can now collapse our stacks. Use Photo > Stacking > Collapse All Stacks (sorry, there is no shortcut for that, sadly!).

And now, we have a much better view of the images in our folder. Now, don’t expect this process to be perfect – you’ll still want to browse your library to make sure that you have the right images stacked together. For example, here are a couple that have obviously gone wrong:
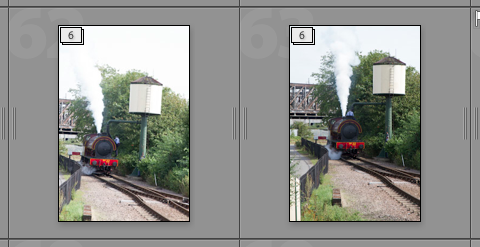
In this case, there are two sets of bracketed images in each stack, that got grouped because I took them in rapid sequence. This can be corrected manually by either dragging images out of the stack, or by unstacking completely (using Photo > Stacking > Unstack or Shift-Ctrl-G / Shift-Cmd-G) and then restocking manually. This is a little bit of work, but not nearly as much as stacking the entire folder of 500 photos by hand!
Or, in this case, I might choose to leave the double sets stacked together, since they are nearly identical anyway.
With the images stacked, it is easy to browse through the library (even Loupe mode honors stacks; you’ll only see the top image in each stack as you work through your images). And, as an added bonus, when you export your bracketed images and convert to HDR, the image that is returned is also grouped into the same stack – saving you even more work (in this example, the stack on the left now has a fourth image, which is the layered TIFF that has been merged to HDR and edited in Photoshop CS6:
I like to drag the final HDR image to the top of the stack (dragging reorders a stack) – just a personal preference. Give it a try! Stack your images, and get organized!


Brilliant, I’d forgotten all about this feature. Thanks for the reminder, really useful for large shoots/collections.
Cheers
Steve H
Ive discovered stacking and I can see how useful it will be. I keep images in a collection by shoot. Collections seems to undo stacking. Is there a workaround? Thanks in advance.
Thanks for the information, there is a lot more about Lightroom that I am learning. I appreciate your taking the time to teach us. I am also trying to learn more about Photoshop, so I am thankful you posted this site.
Charles
Welcome along Charles! Have a browse around, its all 100% free, all we ask is that you share on your favourite social network.
Hi,
Thanks for the info. I had not realised that LR was capable of auto stacking with the time setting. Very useful!
Cheers,
Stef
I was going nuts with 63 images, try to organize them. Just happened up this at the right time. Very grateful.
I was looking for a HDR work flow using PS-CS6 & ALR4. Any suggestions?
Aloha nui loha, Tom