
A Kinder, Gentler HDR in Photoshop CS6
 HDR doesn’t have to be gritty, edgy, with radioactive colors. At its heart, HDR is a technique that can allow you to more accurately capture the images you see – as long as you aren’t too heavy-handed with the controls.
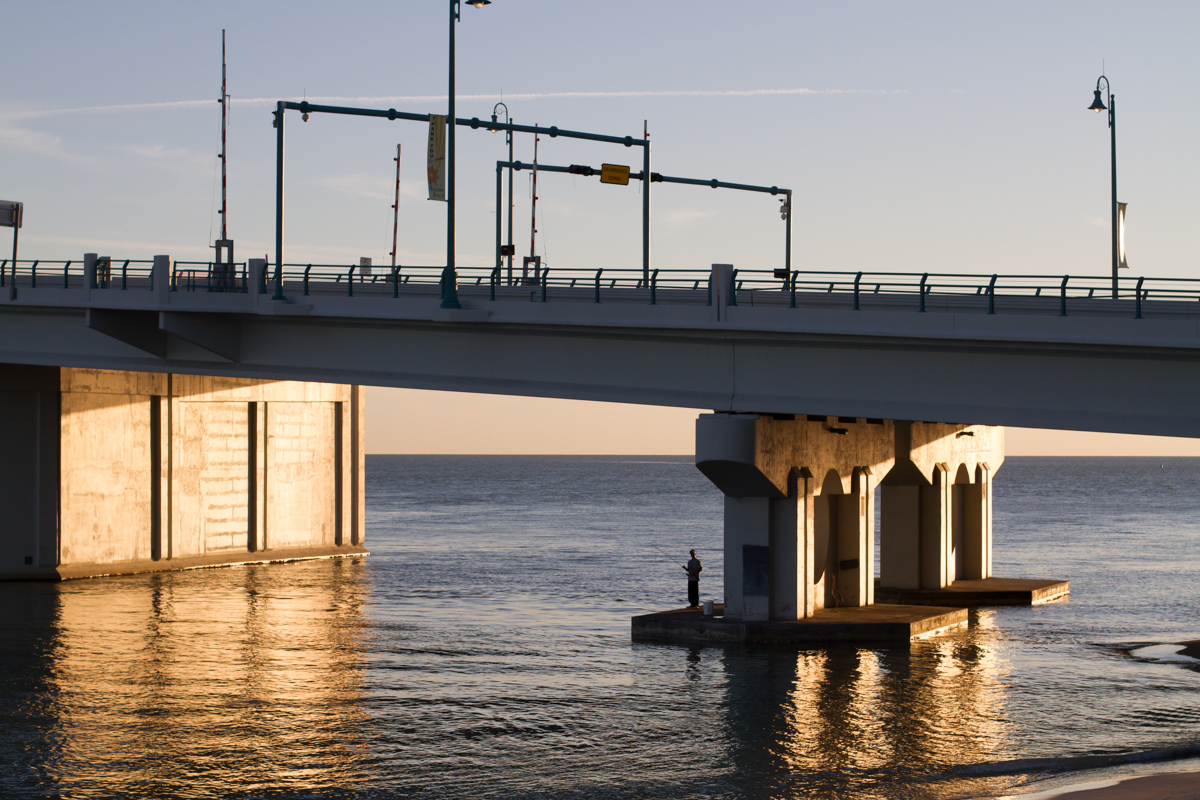
In the image below, we have a dynamic range (from the darkest shadows to the brightest highlights) that exceeds the camera’s ability to capture everything.
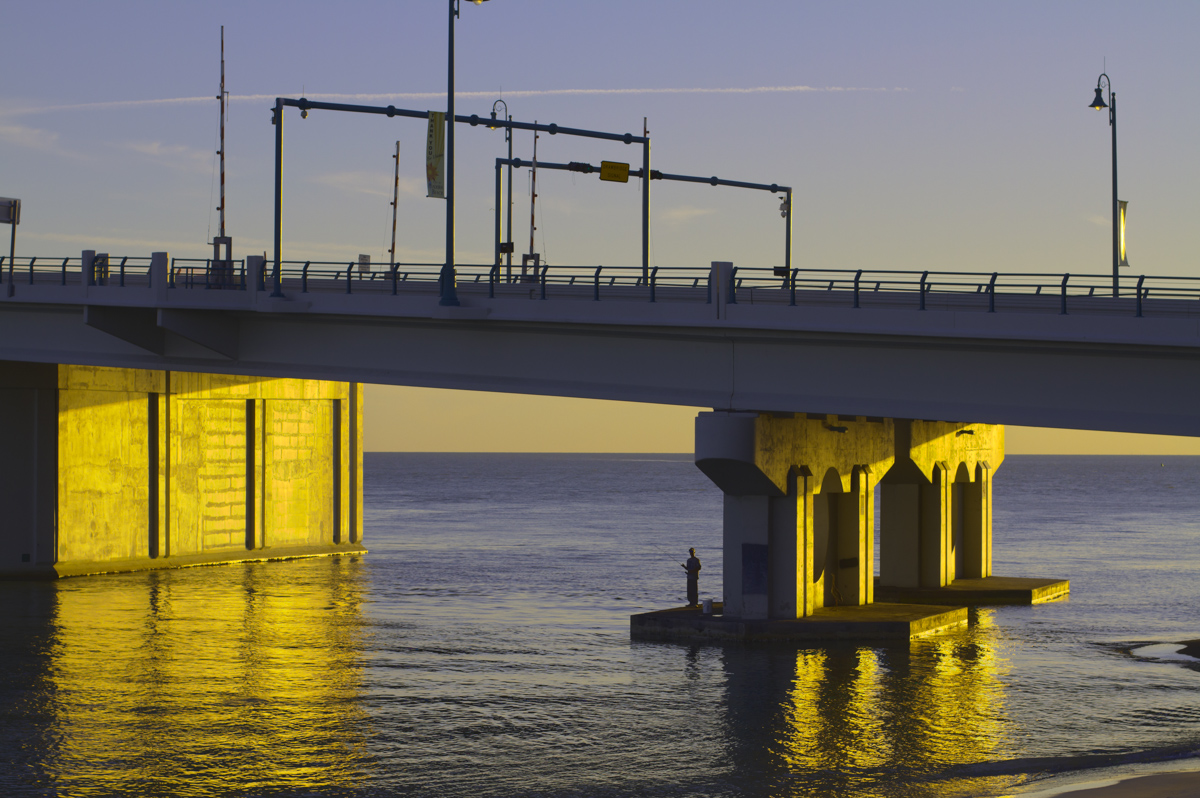
In this after image, we’ve combined some under and over exposed images to bring the highlights and shadows into range, and restored some of the colors that were in the actual scene.
Here’s how it’s done in Merge to HDR Pro and Photoshop:


Thanx Michael for this tutorial. One thing is puzzling though … round the 10:15 mark the toned image is loaded into Photoshop again and things look a lot cooler, the amber yellow is gone. Any reason for this ?
Thank you for the tutorial!
While in priciple I agree with the need to use HDR in a gentler way, this tutorial fell kind of short. I actually prefer the before image with the golden light and the more neutral tones in shadow areas.
Personally I would have tried to bring back overblown highlights in the bridge supports but left the overall colour alone and then added a deeper blue to the sky with a gradient in Photoshop.
But as most things in image editing, perception is highly subjective and this is just my opinion.