As a digital photo restoration artist I don’t always get to work on the two things I love most: old photos and really badly damaged old photos. Sometimes I have to do “ordinary” restorations (newer photos and lightly damaged photos) and some retouching. By retouching, I mean any photo that’s not being restored, or made the way it was. Now, bear in mind, I’m not a retoucher! However, by its very nature, restoration involves some retouching work and it’s one more facet of the craft you must be familiar with and do well. Retouching and customizing are actually a rather large part of my work.
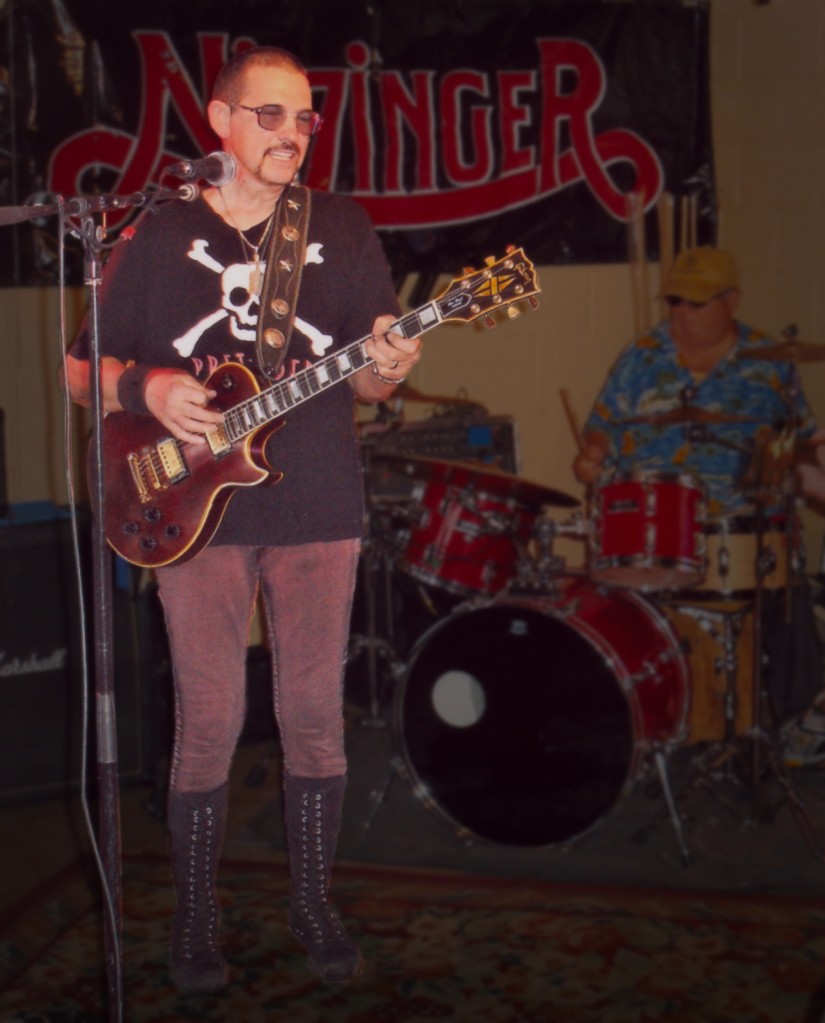
A couple of days ago I got a visit from the editor of the newspaper I write for, asking me for some help; he has a photo that needs to run both in the paper and in some advertising. The photo, of Texas Rock music legend John Nitzinger (photo taken by W. Ludwig, used with permission), was being used to promote Nitzinger’s appearance at an upcoming area festival (and yes, I’m just old enough, and geeky enough to know of John Nitzinger and be excited about doing this – and meeting him at the festival). My editor wanted me to remove the background from the picture and, well, leave him floating in the middle of nothing. I told him I’d be happy to remove the background, but my artistic sensibilities *insert snobby sniff here* wouldn’t allow me to let the “floating in air” thing happen, and no, I don’t think it would look “cool”. So I suggested he let me remove, then fade the background. It would give John the prominence the editor wanted without looking…wrong. This is also a great alternative to using selective color (converting all but the main subject to black & white), which is, in my opinion, becoming rather overused as far as Photoshop techniques are concerned.

To begin, make a duplicate of your original layer (Ctrl or Cmd + J). Since this was a very busy background, I didn’t bother with the quick selection tools and such. Besides, since I have some experience detailing pinstripes, I actually enjoy just removing a background by hand once in a while. It’s very detailed work, but if you don’t like or aren’t good at detail then digital photo restoration, or retouching for that matter, isn’t for you. After all digital photo restoration is made up of repairing details. You’re free, of course, to remove backgrounds in which ever way works best for you. A combination of ways that works best for whatever photo I’m working on at any given time works best for me, so I’m the last one to advocate any one method. Before you begin removing the background add a layer mask to the duplicate layer. Always add a layer mask when taking out the background by hand! If you do, you can go back and correct details. If not, you’ll probably find yourself starting over, at least once!

In this particular photo, I had to be aware of all the foreground elements. You don’t want pieces of the foreground to fade into the background, usually. You want the finished product to make sense. For example, in this case it wouldn’t have made sense for the mic stand to be in the foreground when it crossed over the arm, but faded into the background when it didn’t.
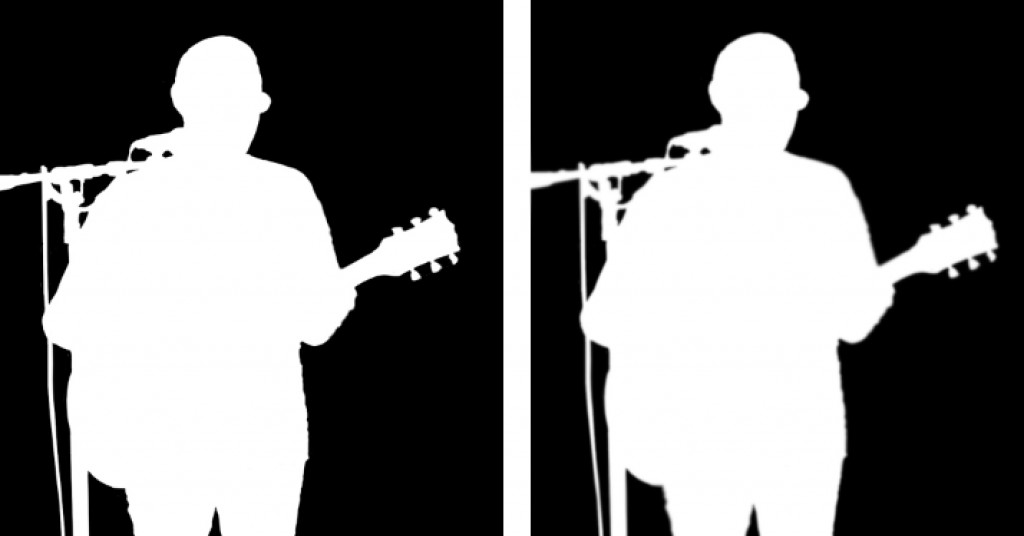
When the masking is down and the background is removed to your satisfaction, the mask will need a slight blur. To see what you’re doing a bit better, click over the mask itself in the layer stack while pressing in the Alt key. Your main image will now be the black and white layer mask. Use either Gaussian Blur or your Blur tool, but use it lightly. You just want it slightly blurred to remove any jagged edges, not a blurry mess.
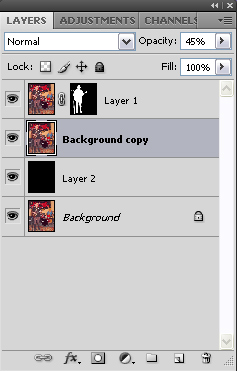
Now it’s time to stack. Make a second duplicate of your original layer. I repeat, make the duplicate of the original, un-masked layer! It will now reside between the original and the masked layers. Next, between the original layer and the second duplicate, add a blank layer and fill it with black (or whichever color works best for the photo in question). You now have four layers, the original, the fill layer, the duplicate of the original and the layer that’s been masked to remove the background.
Working now on the layer beneath the layer mask – the copy of the original. First, go to Filter > Blur > Gaussian Blur. Putting a slight blur on the background will not only instill a sense of depth, but will serve to make it less noticeable than the foreground. I used a setting of 3.0 for this purpose. Again, keep it on the lower side.
Now, lower the opacity of this layer. You’ll have to eyeball this to ascertain how low to take the opacity, but there’s a fine line between just enough and too much, here. You want it to fade sufficiently into the black fill layer to become less noticeable, but you want to avoid the “floating in space” effect. I found 45% opacity to be just about right.
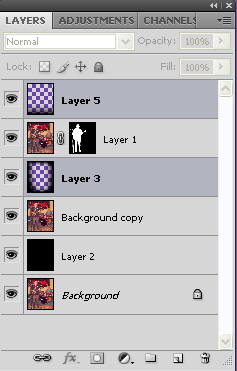
To finish this particular project, I added some vignetting. Using the Gradient Tool, set black to transparent, and working on a blank layer set in between the layer mask and the now blurred and faded background copy, I go around the edges of the blank layer. Lower the opacity (I used 27% opacity). I also make a new blank layer at the top of the stack and put a gradient line just at the bottom to ground the foreground into the background, in this case, Mr. Nitzinger’s feet. Lower the opacity for this layer as well (in this case, 50%).
Now, instead of a photo of a John Nitzinger and a drummer in a really loud shirt or even a photo of a floating guitar player, it’s a photo of John Nitzinger. The main focus of the photograph has become easier to focus on.
This is also a technique you can employ when working on old photos. When you have a moderately damaged background and you want to replace it with, say for instance, sky, you can add a new background faded into the old one for a more realistic look, giving you more of the feel of the original, but adding just a hint of clouds!


Leave a comment